
How to Register Your App
This guide explains how to register your application on portal.byterialab.com and generate an API key for SDK integration.
Prerequisites
Section titled “Prerequisites”- A valid Portal account with access to the organization/workspace
- Permission to register apps and generate API keys
- A modern browser (Chrome / Safari / Firefox)
Note If you don’t see Apps in the left menu, your account may not have the required permissions. Contact your organization admin.
Step 1: Open the Portal
Section titled “Step 1: Open the Portal”- Go to portal.byterialab.com.
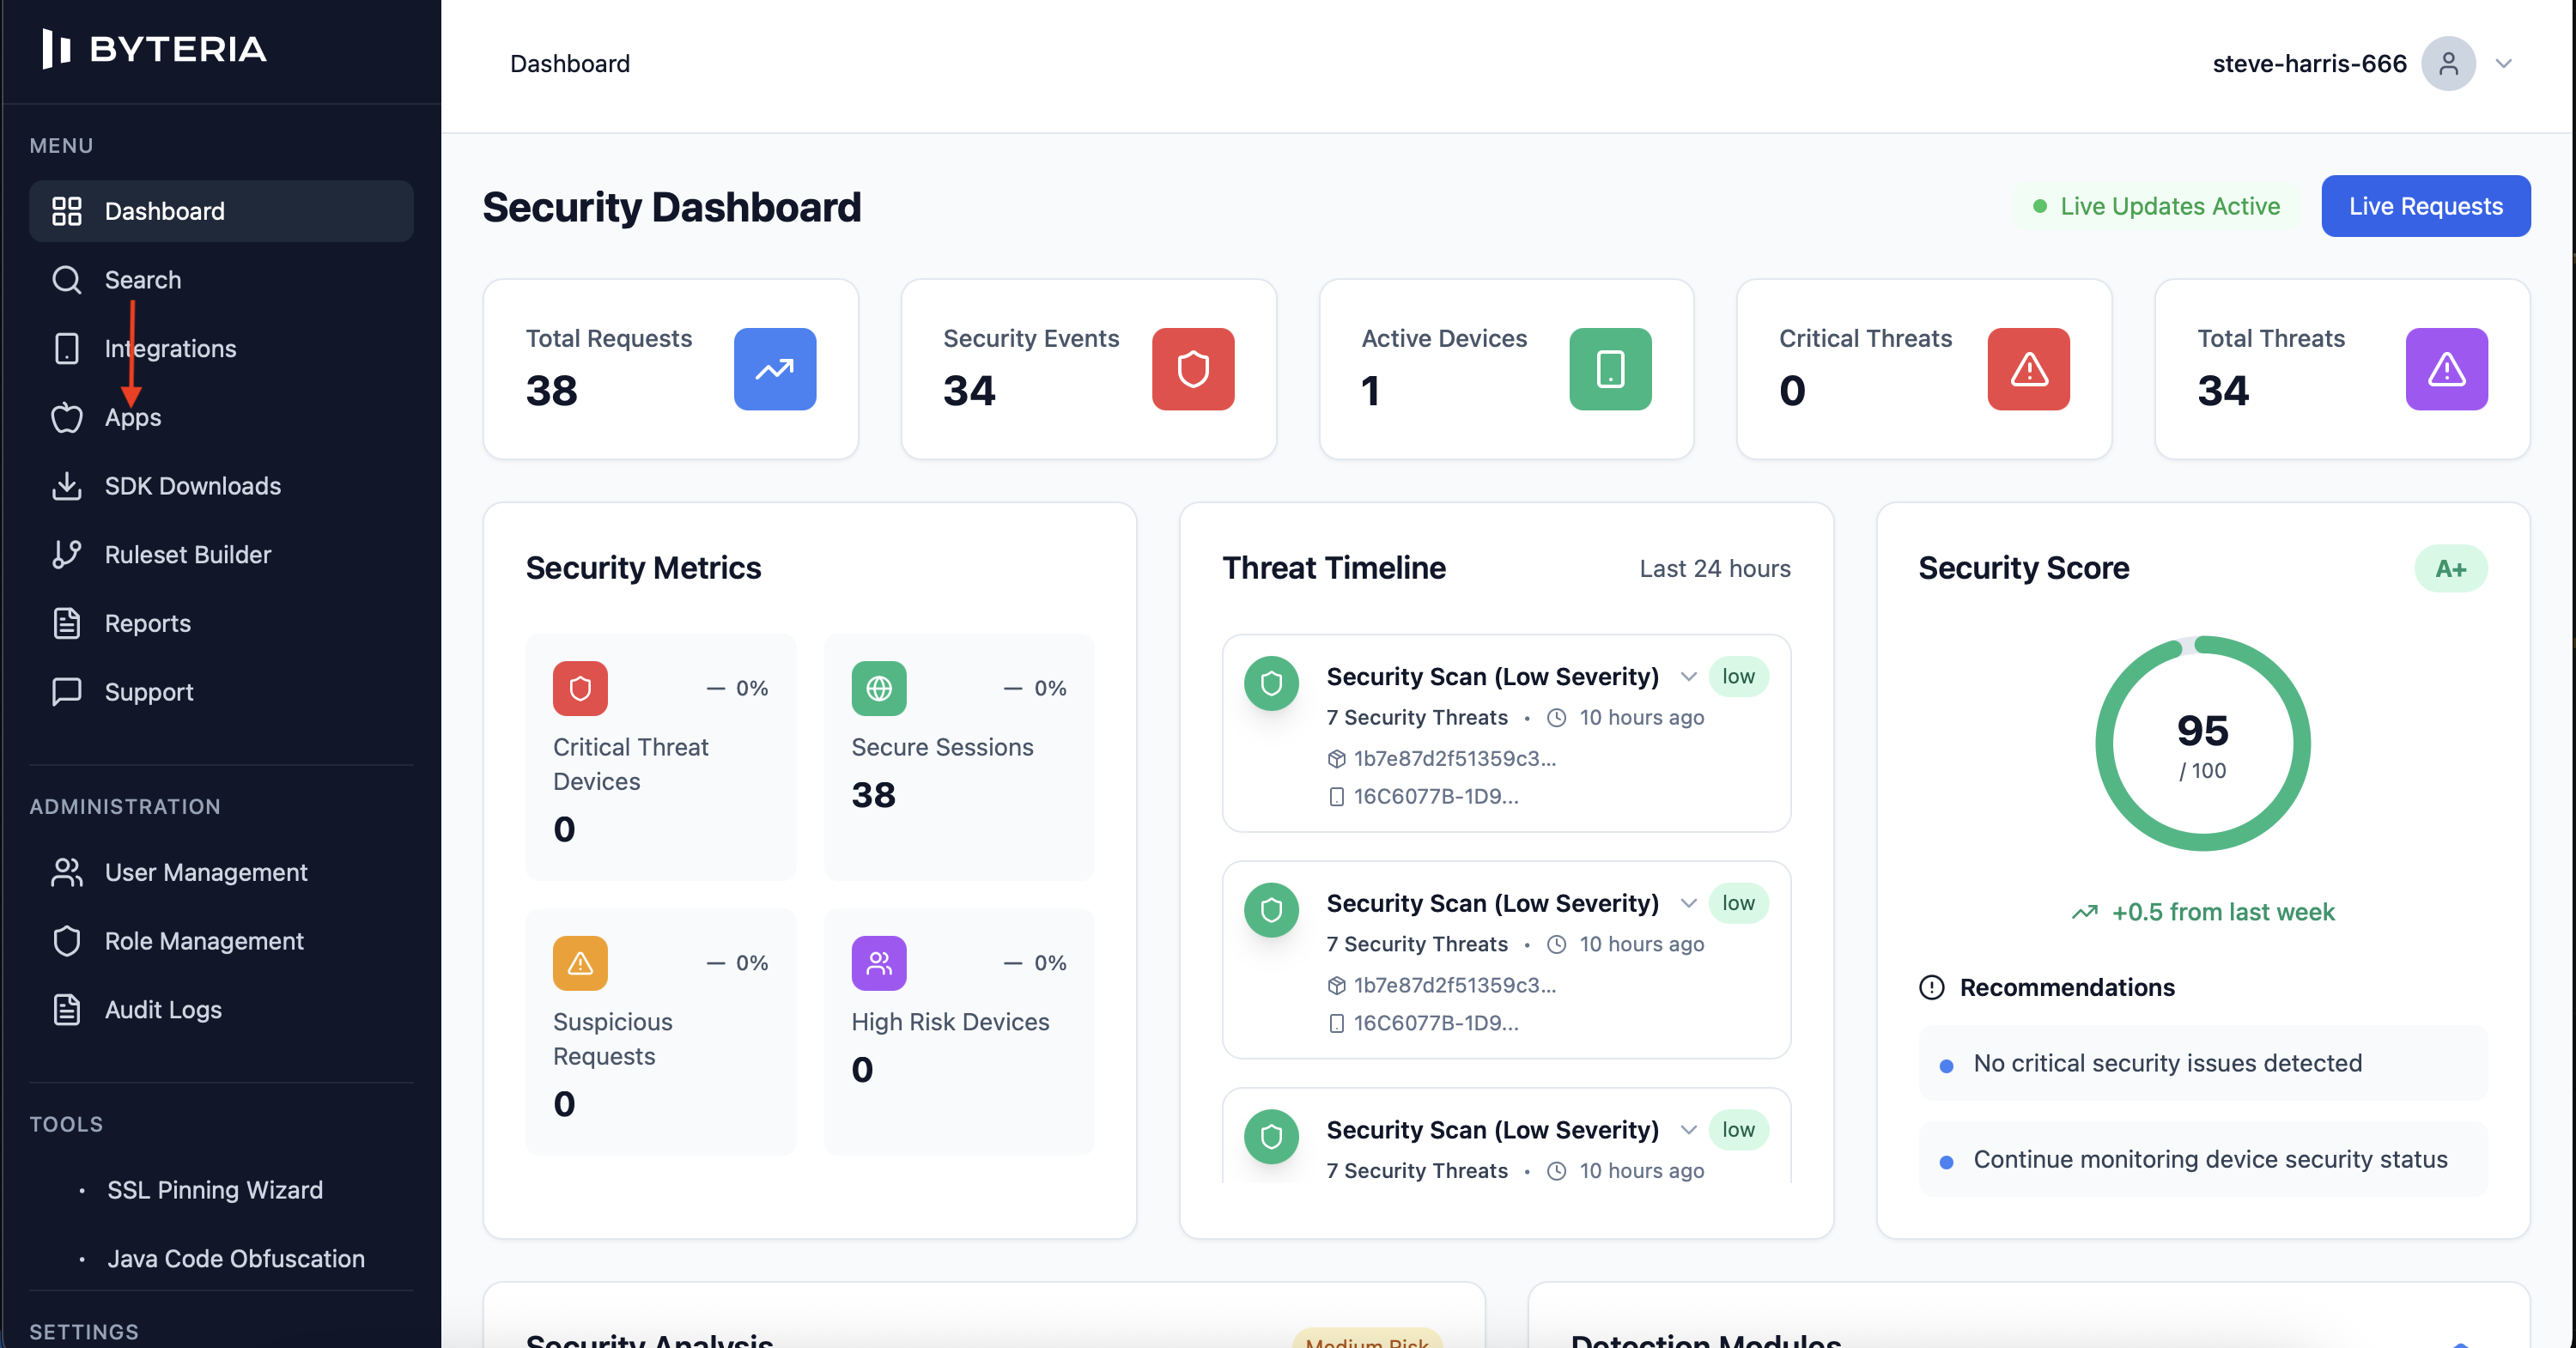
Expected result: You should land on the Portal home page.
Step 2: Navigate to Apps and Start Registration
Section titled “Step 2: Navigate to Apps and Start Registration”- From the left menu, locate Apps.
- Click Register App.
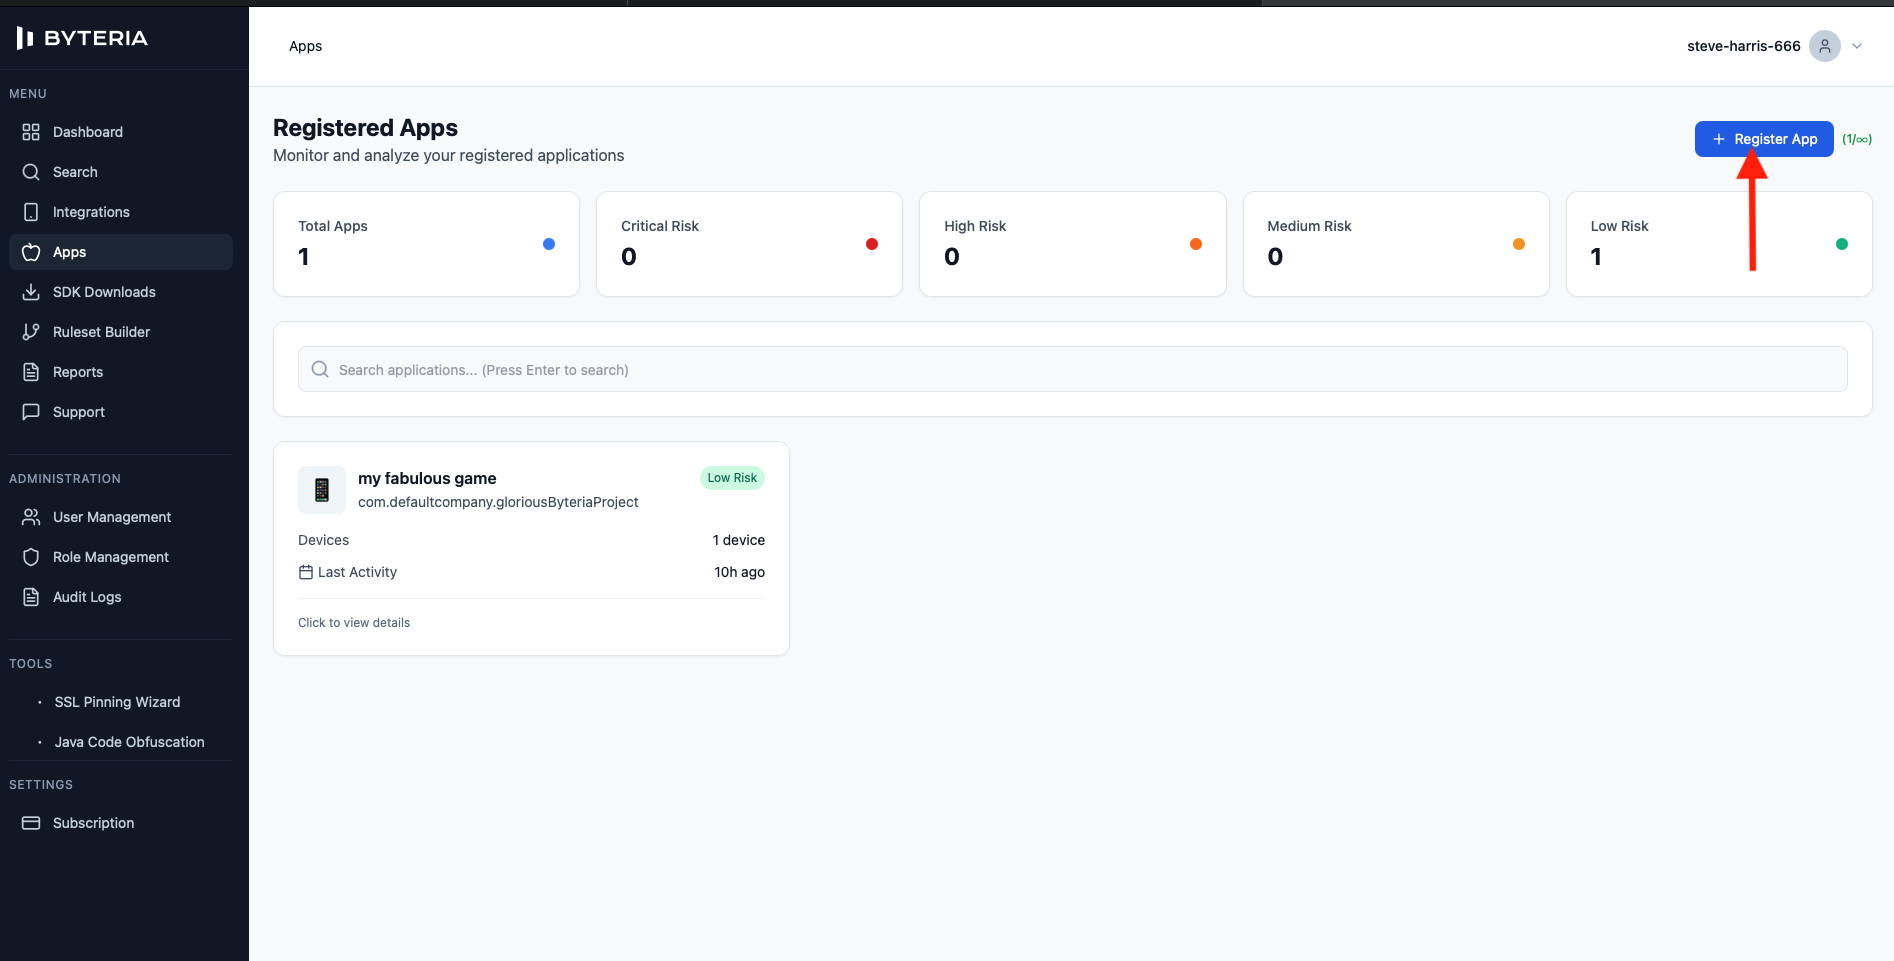
Expected result: The app registration form opens.
Step 3: Fill the Registration Form
Section titled “Step 3: Fill the Registration Form”- Fill in the required fields in the form.
- Click Register App.
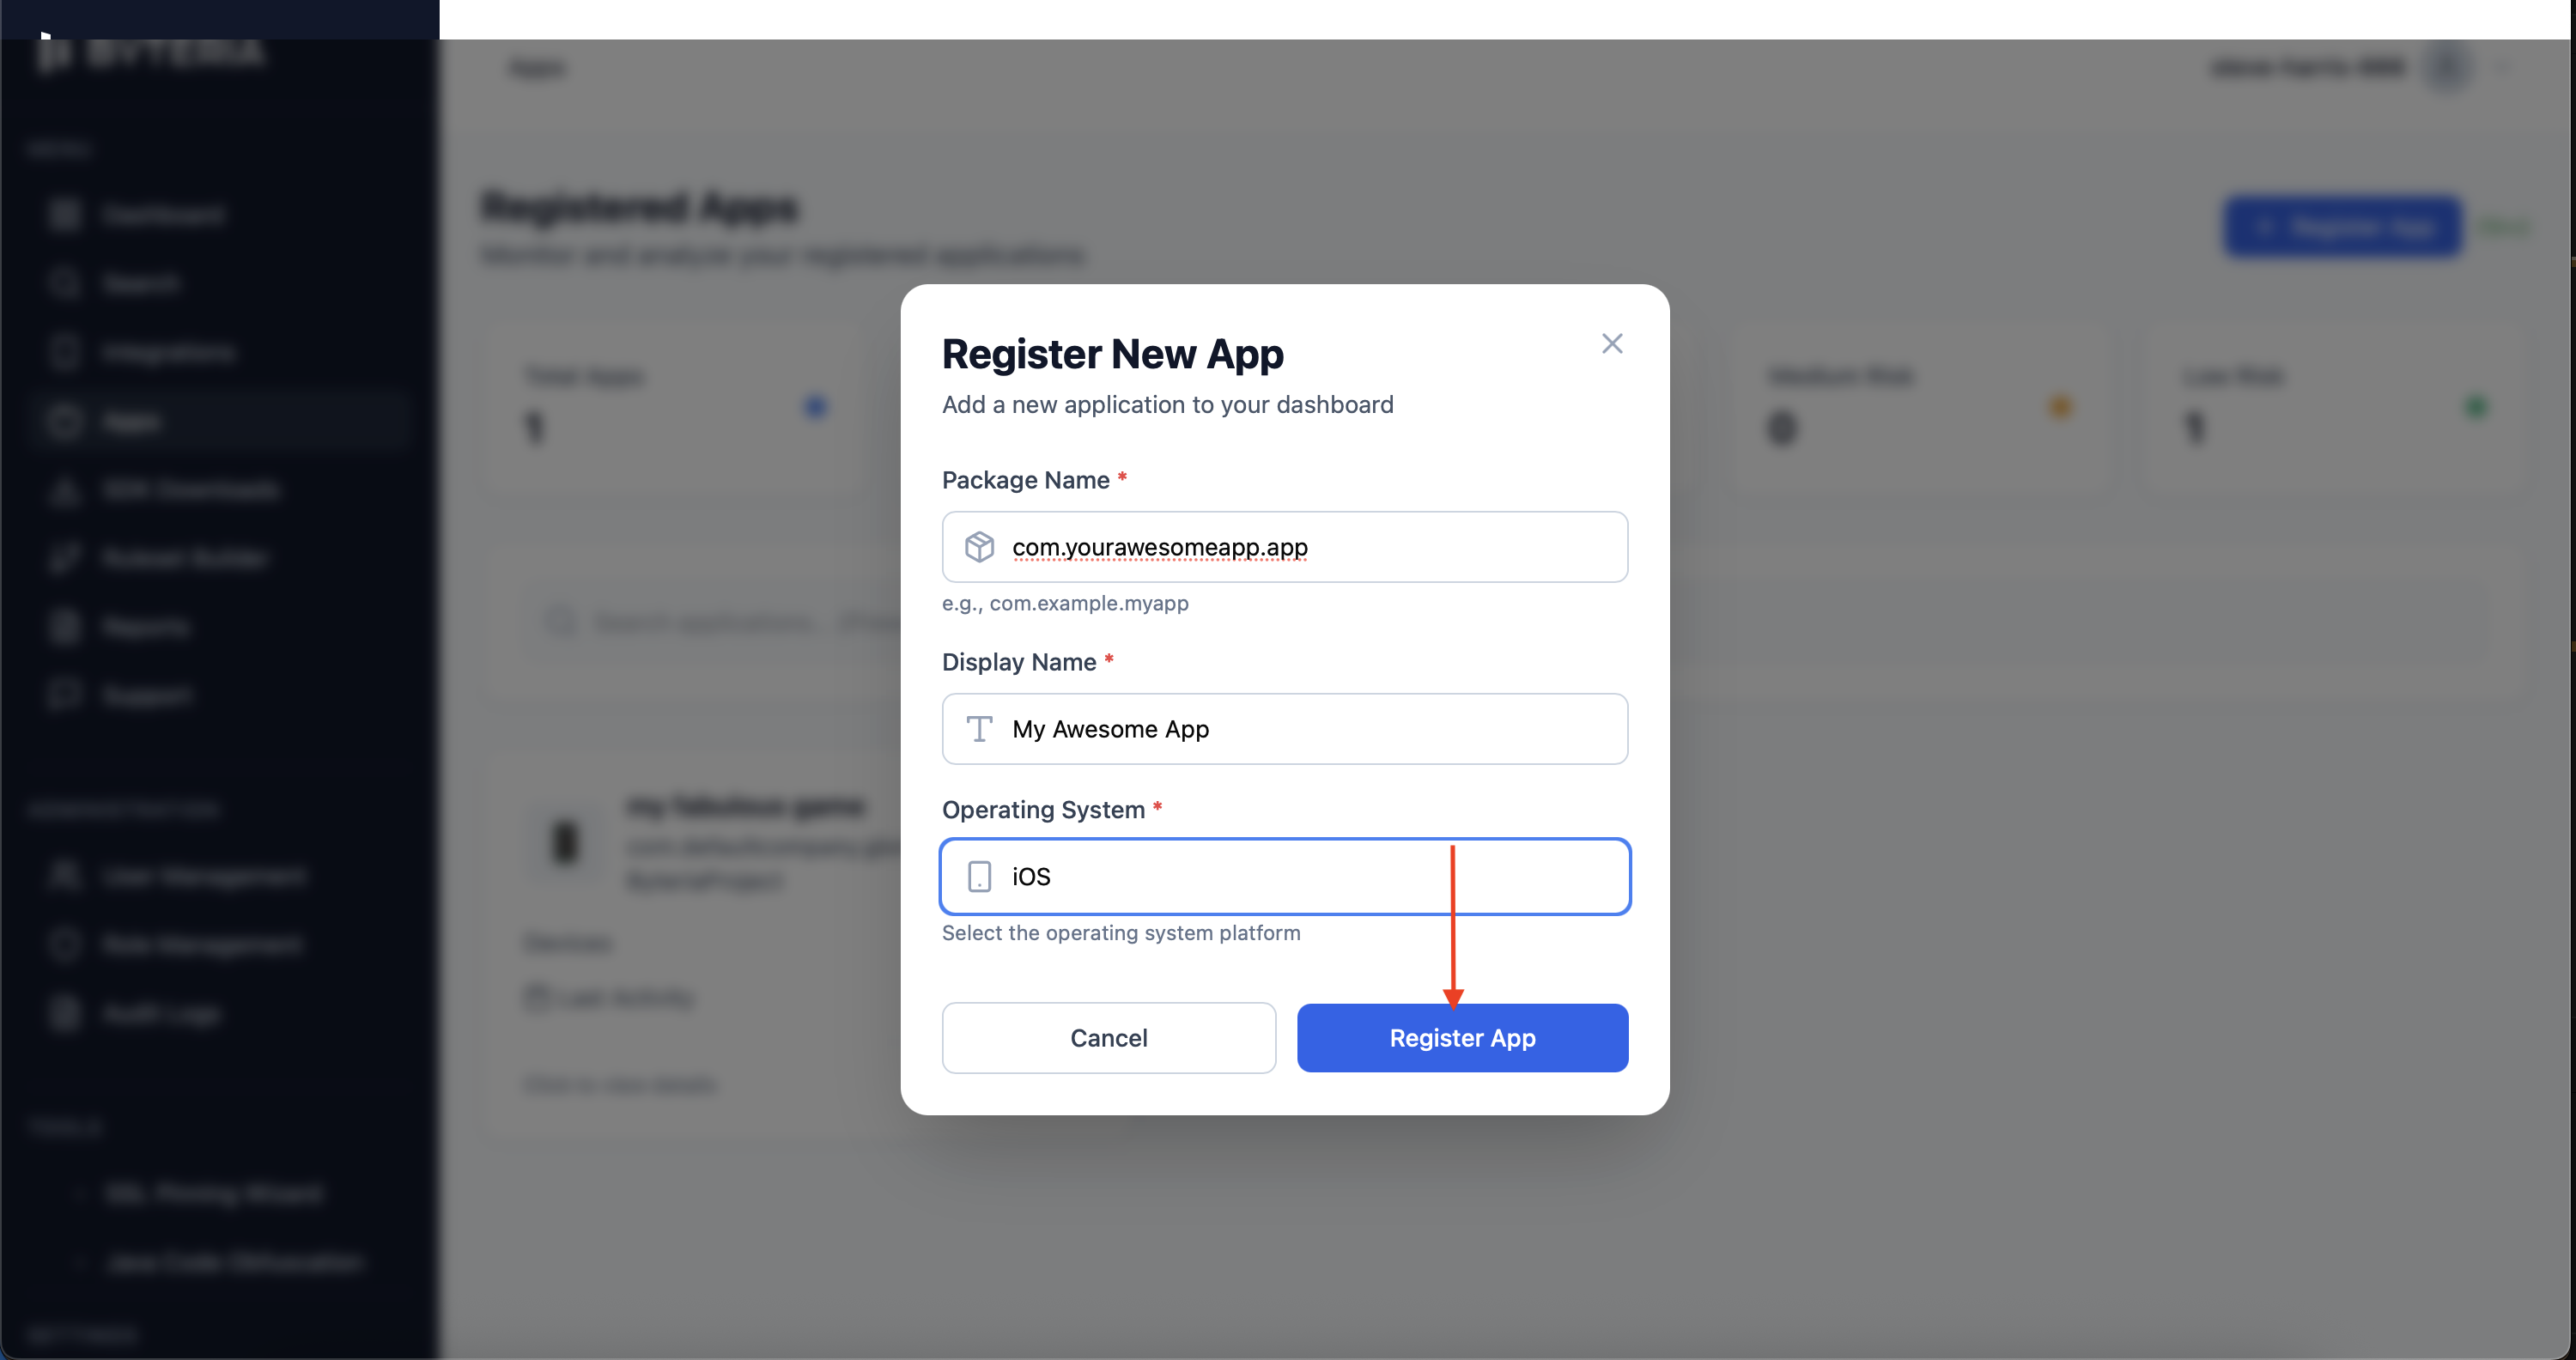
Form Fields (Example)
Section titled “Form Fields (Example)”- Package Name:
yourPackage.NameIn.YourAppBundleThe way you use in XCode - Platform:
iOS / Android(choose your platform) - Display Name The name you want to see your app in Portal
Tip Use the exact Bundle ID/Package Name from your project settings. Mismatches can cause SDK authentication failures.
Cross-platform apps (React Native, Flutter, Unity): register one app per platform
Section titled “Cross-platform apps (React Native, Flutter, Unity): register one app per platform”An app registration is per platform, and each API key belongs to exactly one registered app. If your project ships both an Android and an iOS build, register two apps:
- One app with Platform: Android and your Android package name (the
applicationId). - One app with Platform: iOS and your iOS bundle identifier.
Each registration gets its own API key. Use the Android app’s key when registering Android builds (the Gradle build hook and alphyn-cli register --apk) and the iOS app’s key in the Xcode archive post-action. The backend accepts a registration only from the matching platform’s key, so a build registered with the other platform’s key is rejected with a clear error instead of being recorded against the wrong app.
Expected result: Portal redirects you to the newly created app’s dashboard.
Step 4: Open the App Dashboard and Go to API Keys
Section titled “Step 4: Open the App Dashboard and Go to API Keys”- On your app’s dashboard page, open API keys.
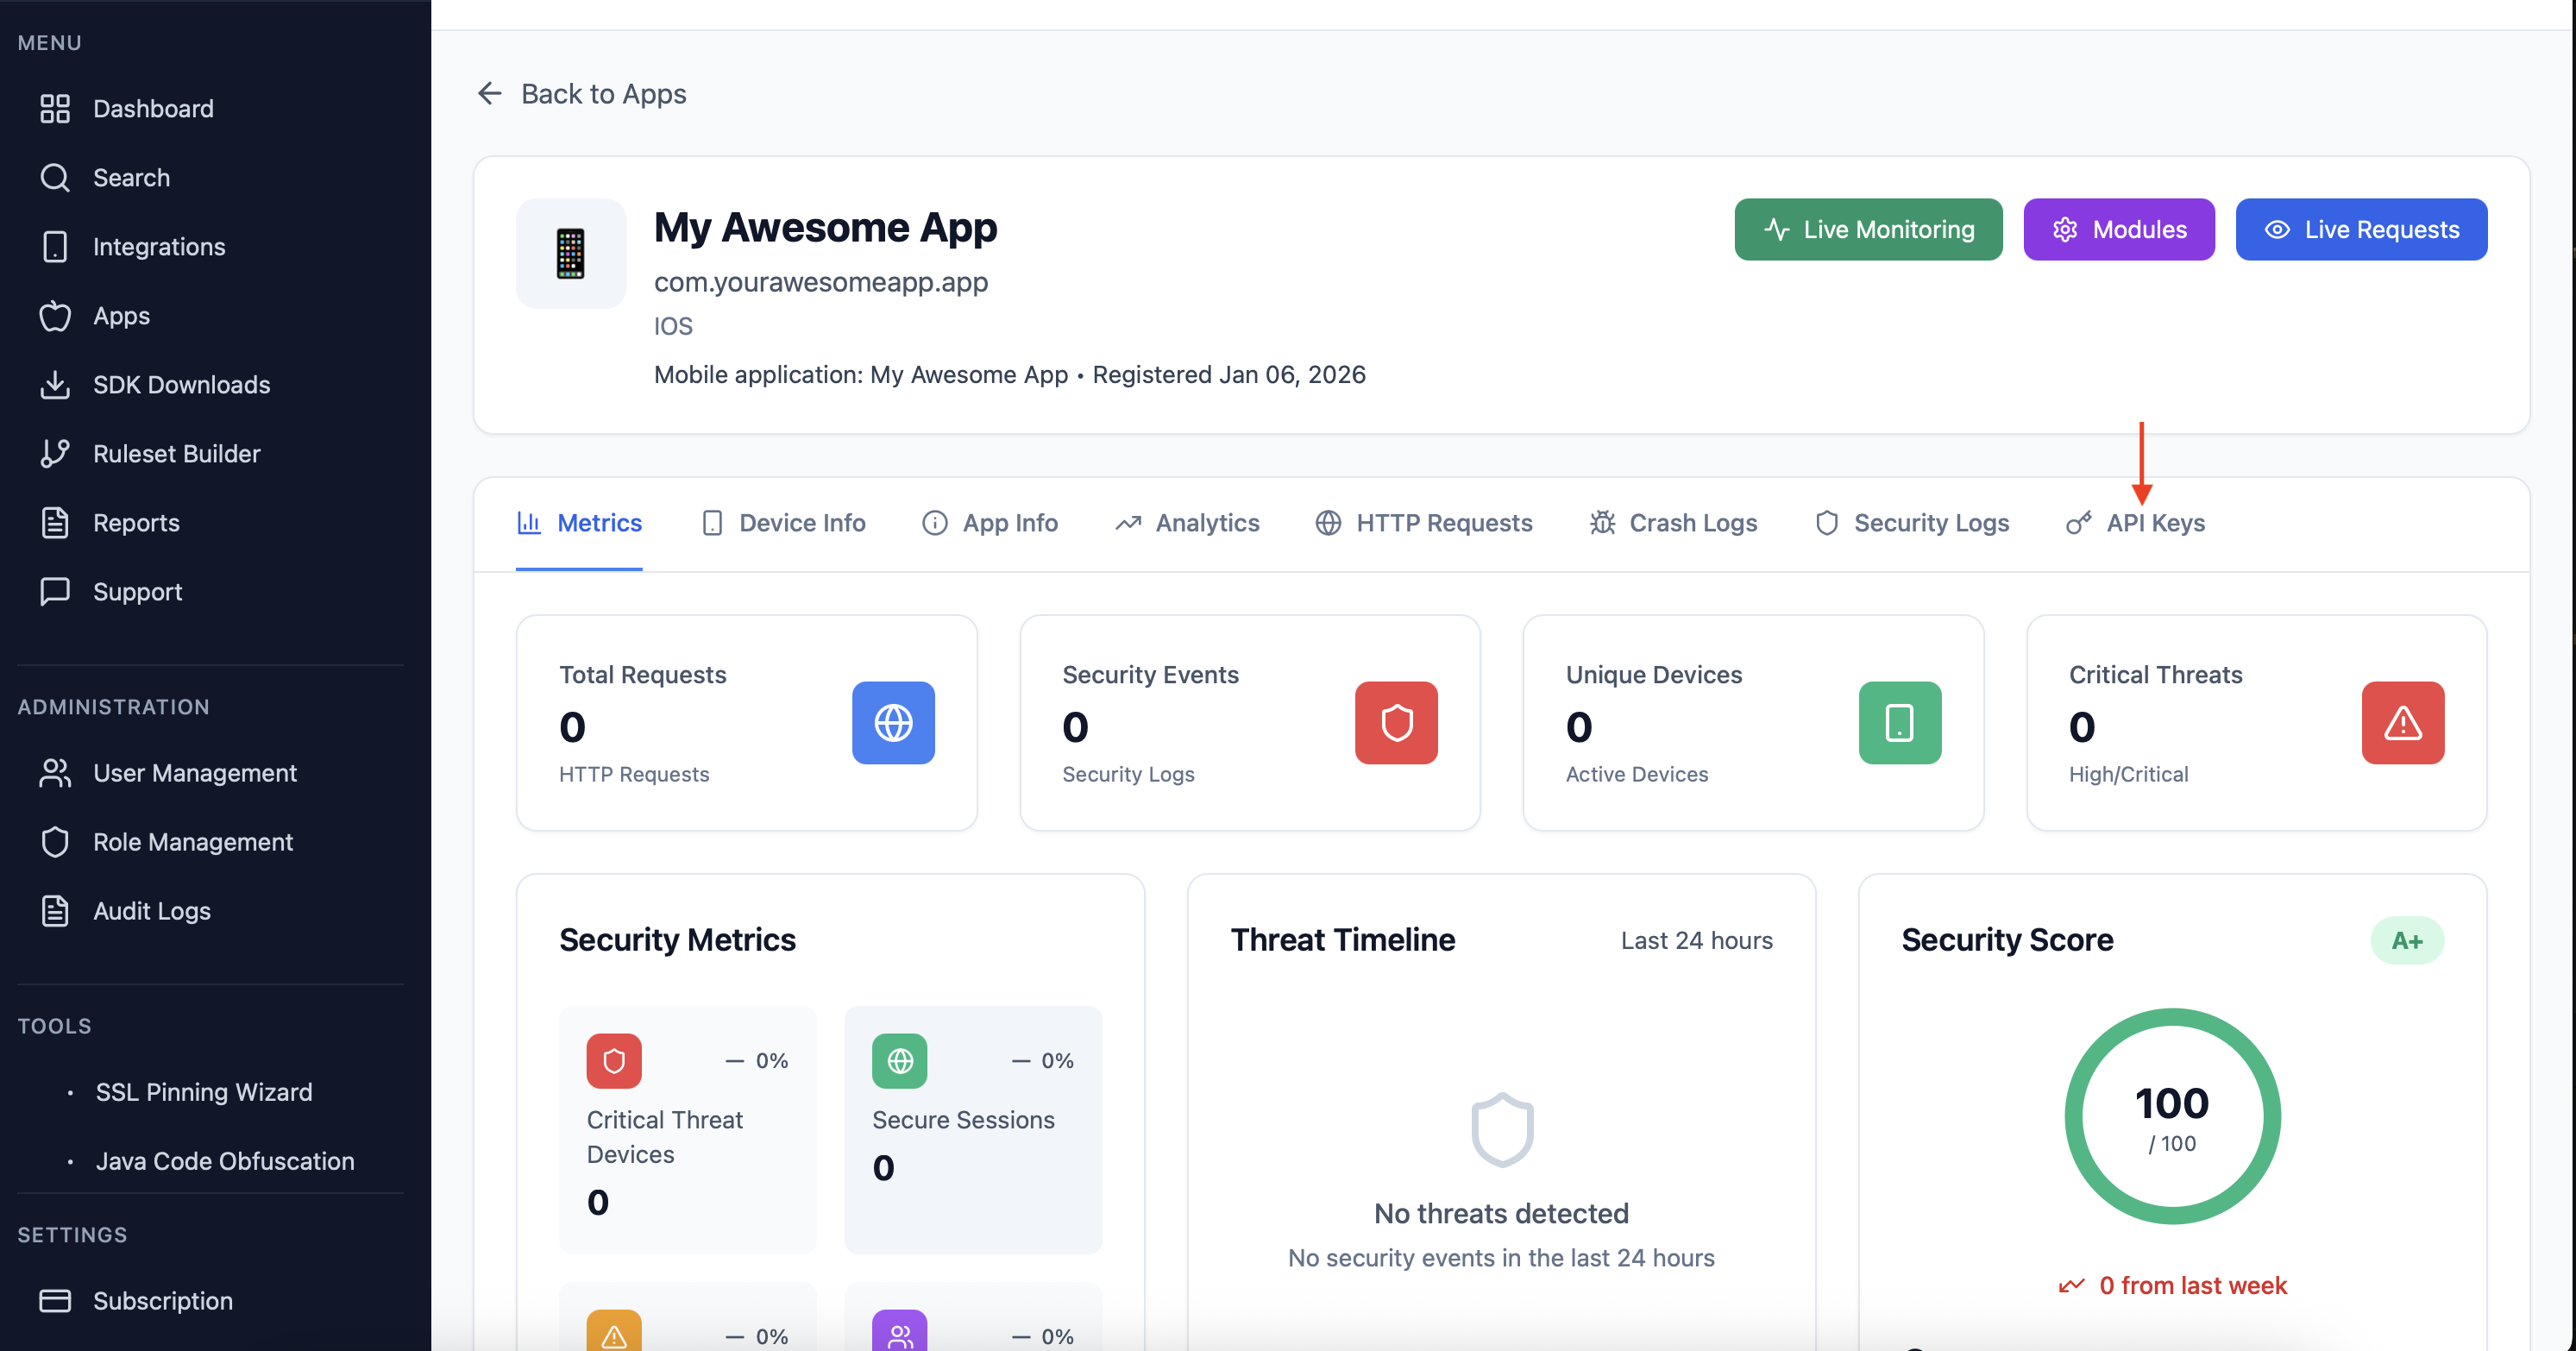
Expected result: You should see the API keys management page.
Step 5: Generate a New Key
Section titled “Step 5: Generate a New Key”- Click Generate key.
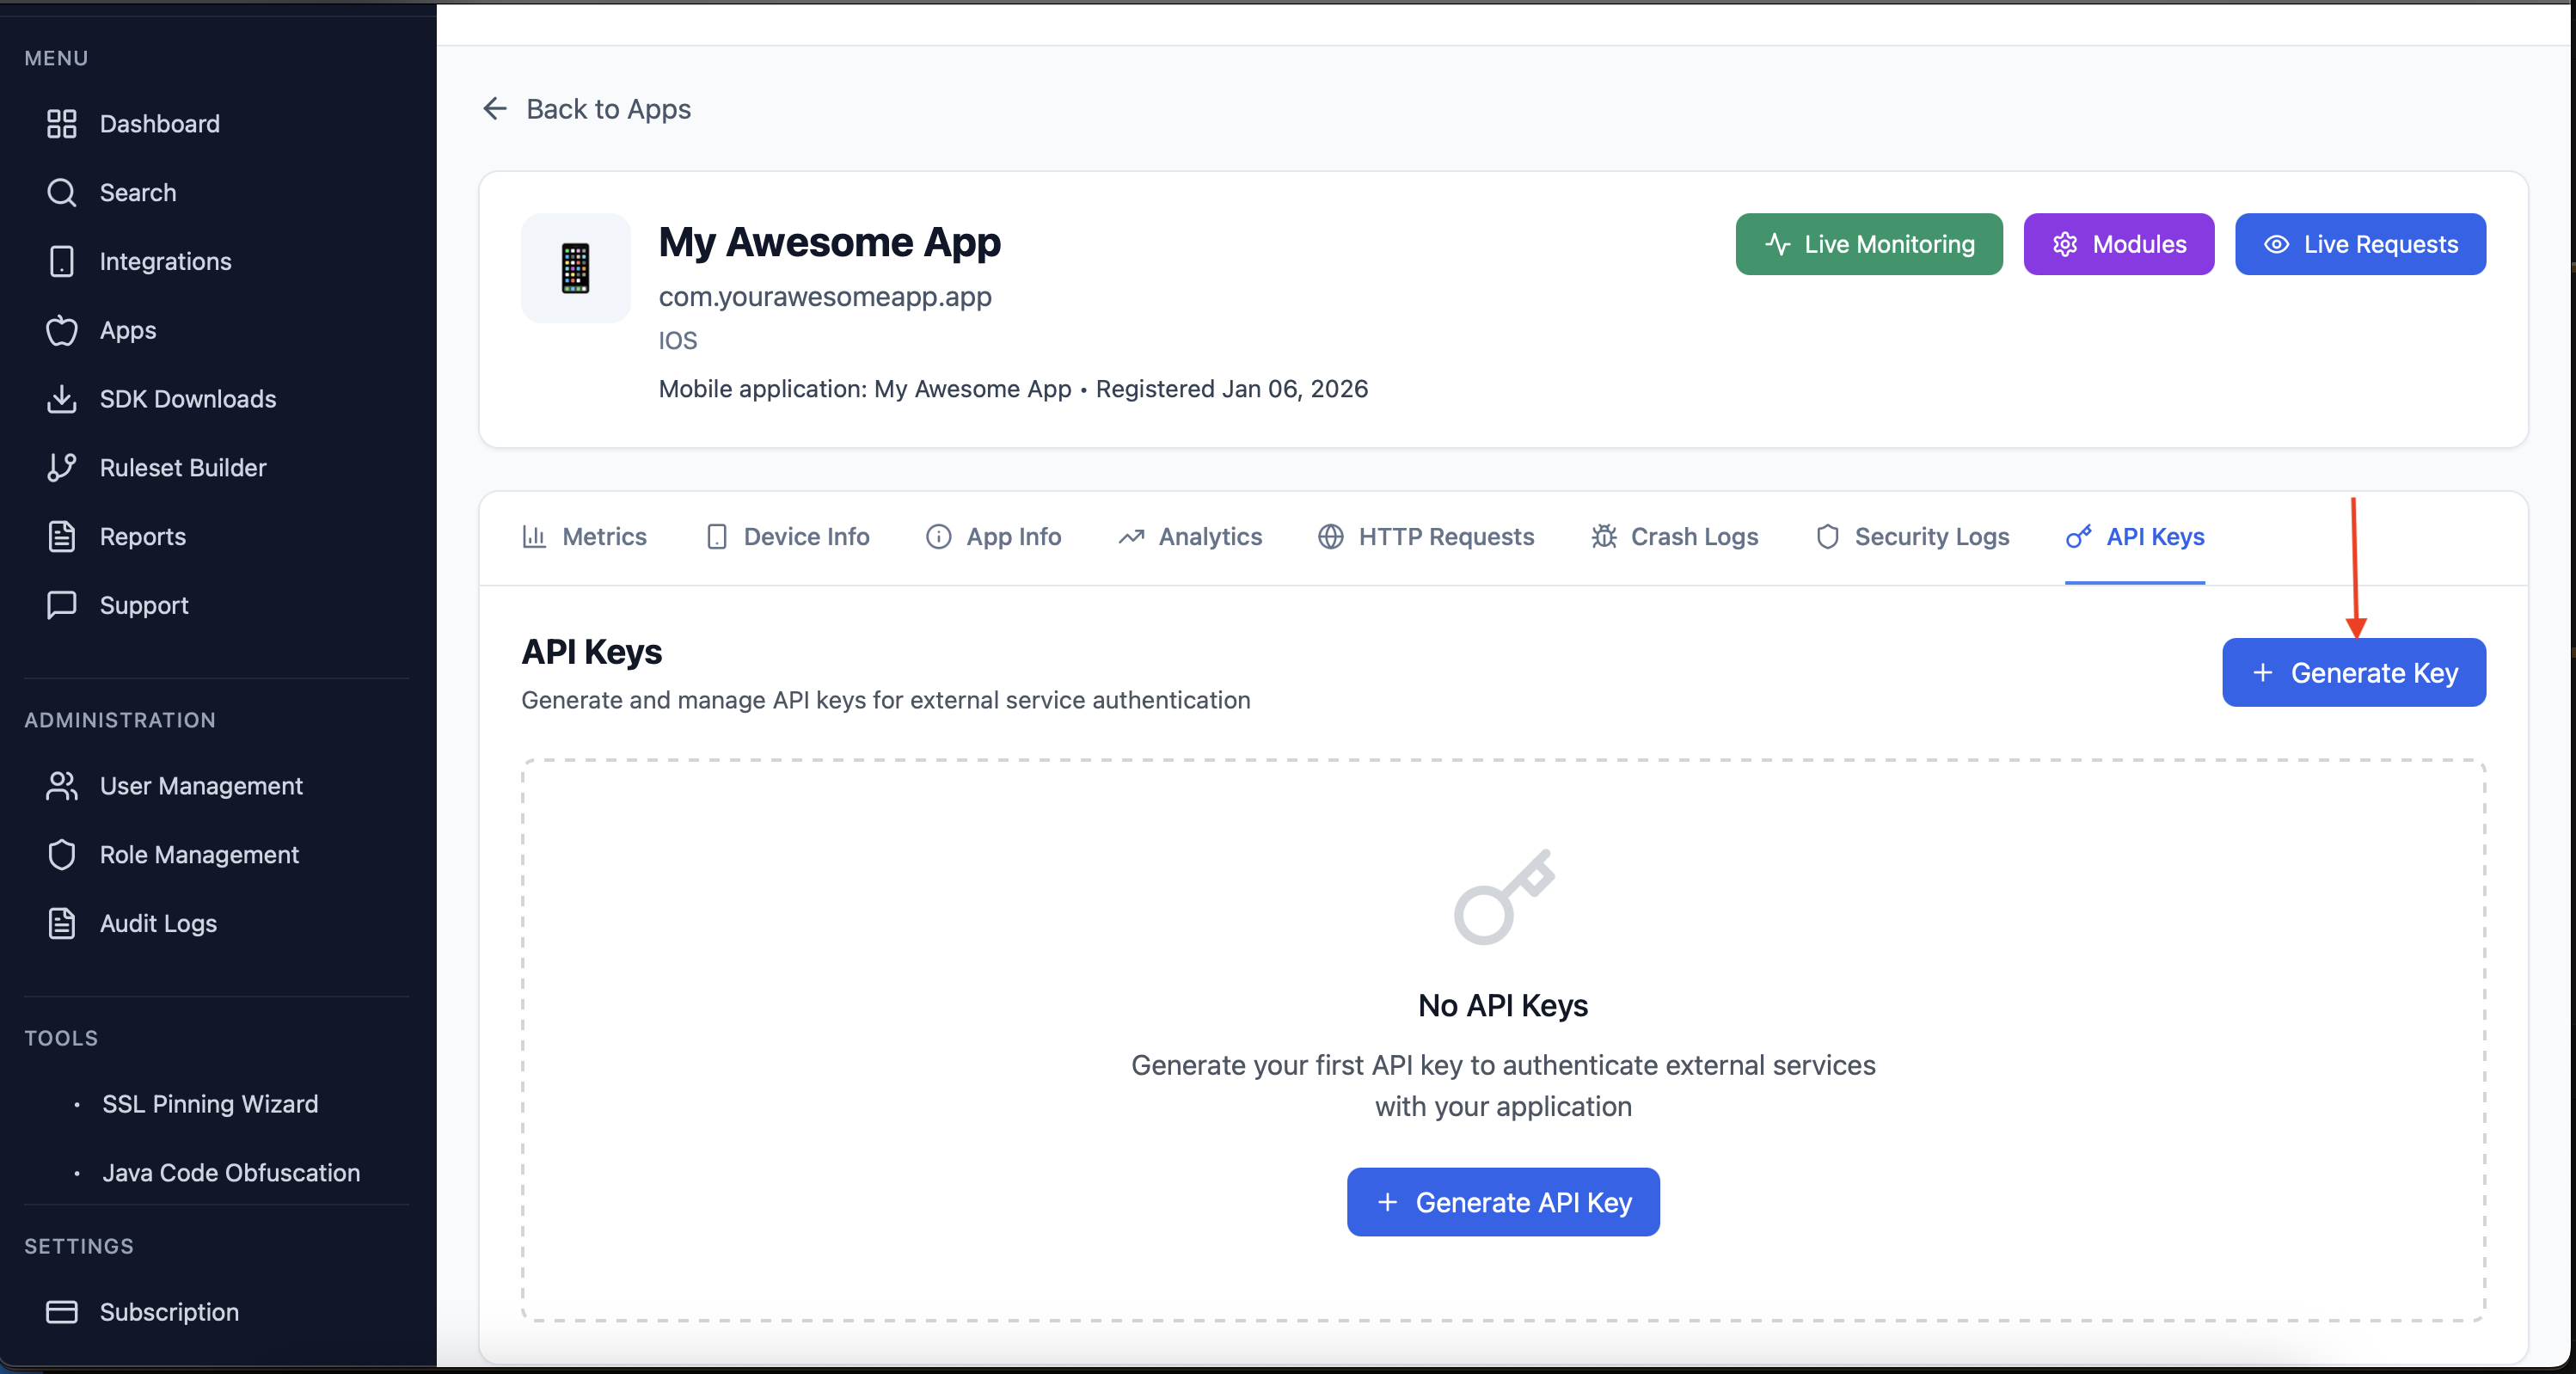
Expected result: A key creation dialog/modal opens.
Step 6: Name Your API Key
Section titled “Step 6: Name Your API Key”- Enter a name for your API key.
- Click Generate.
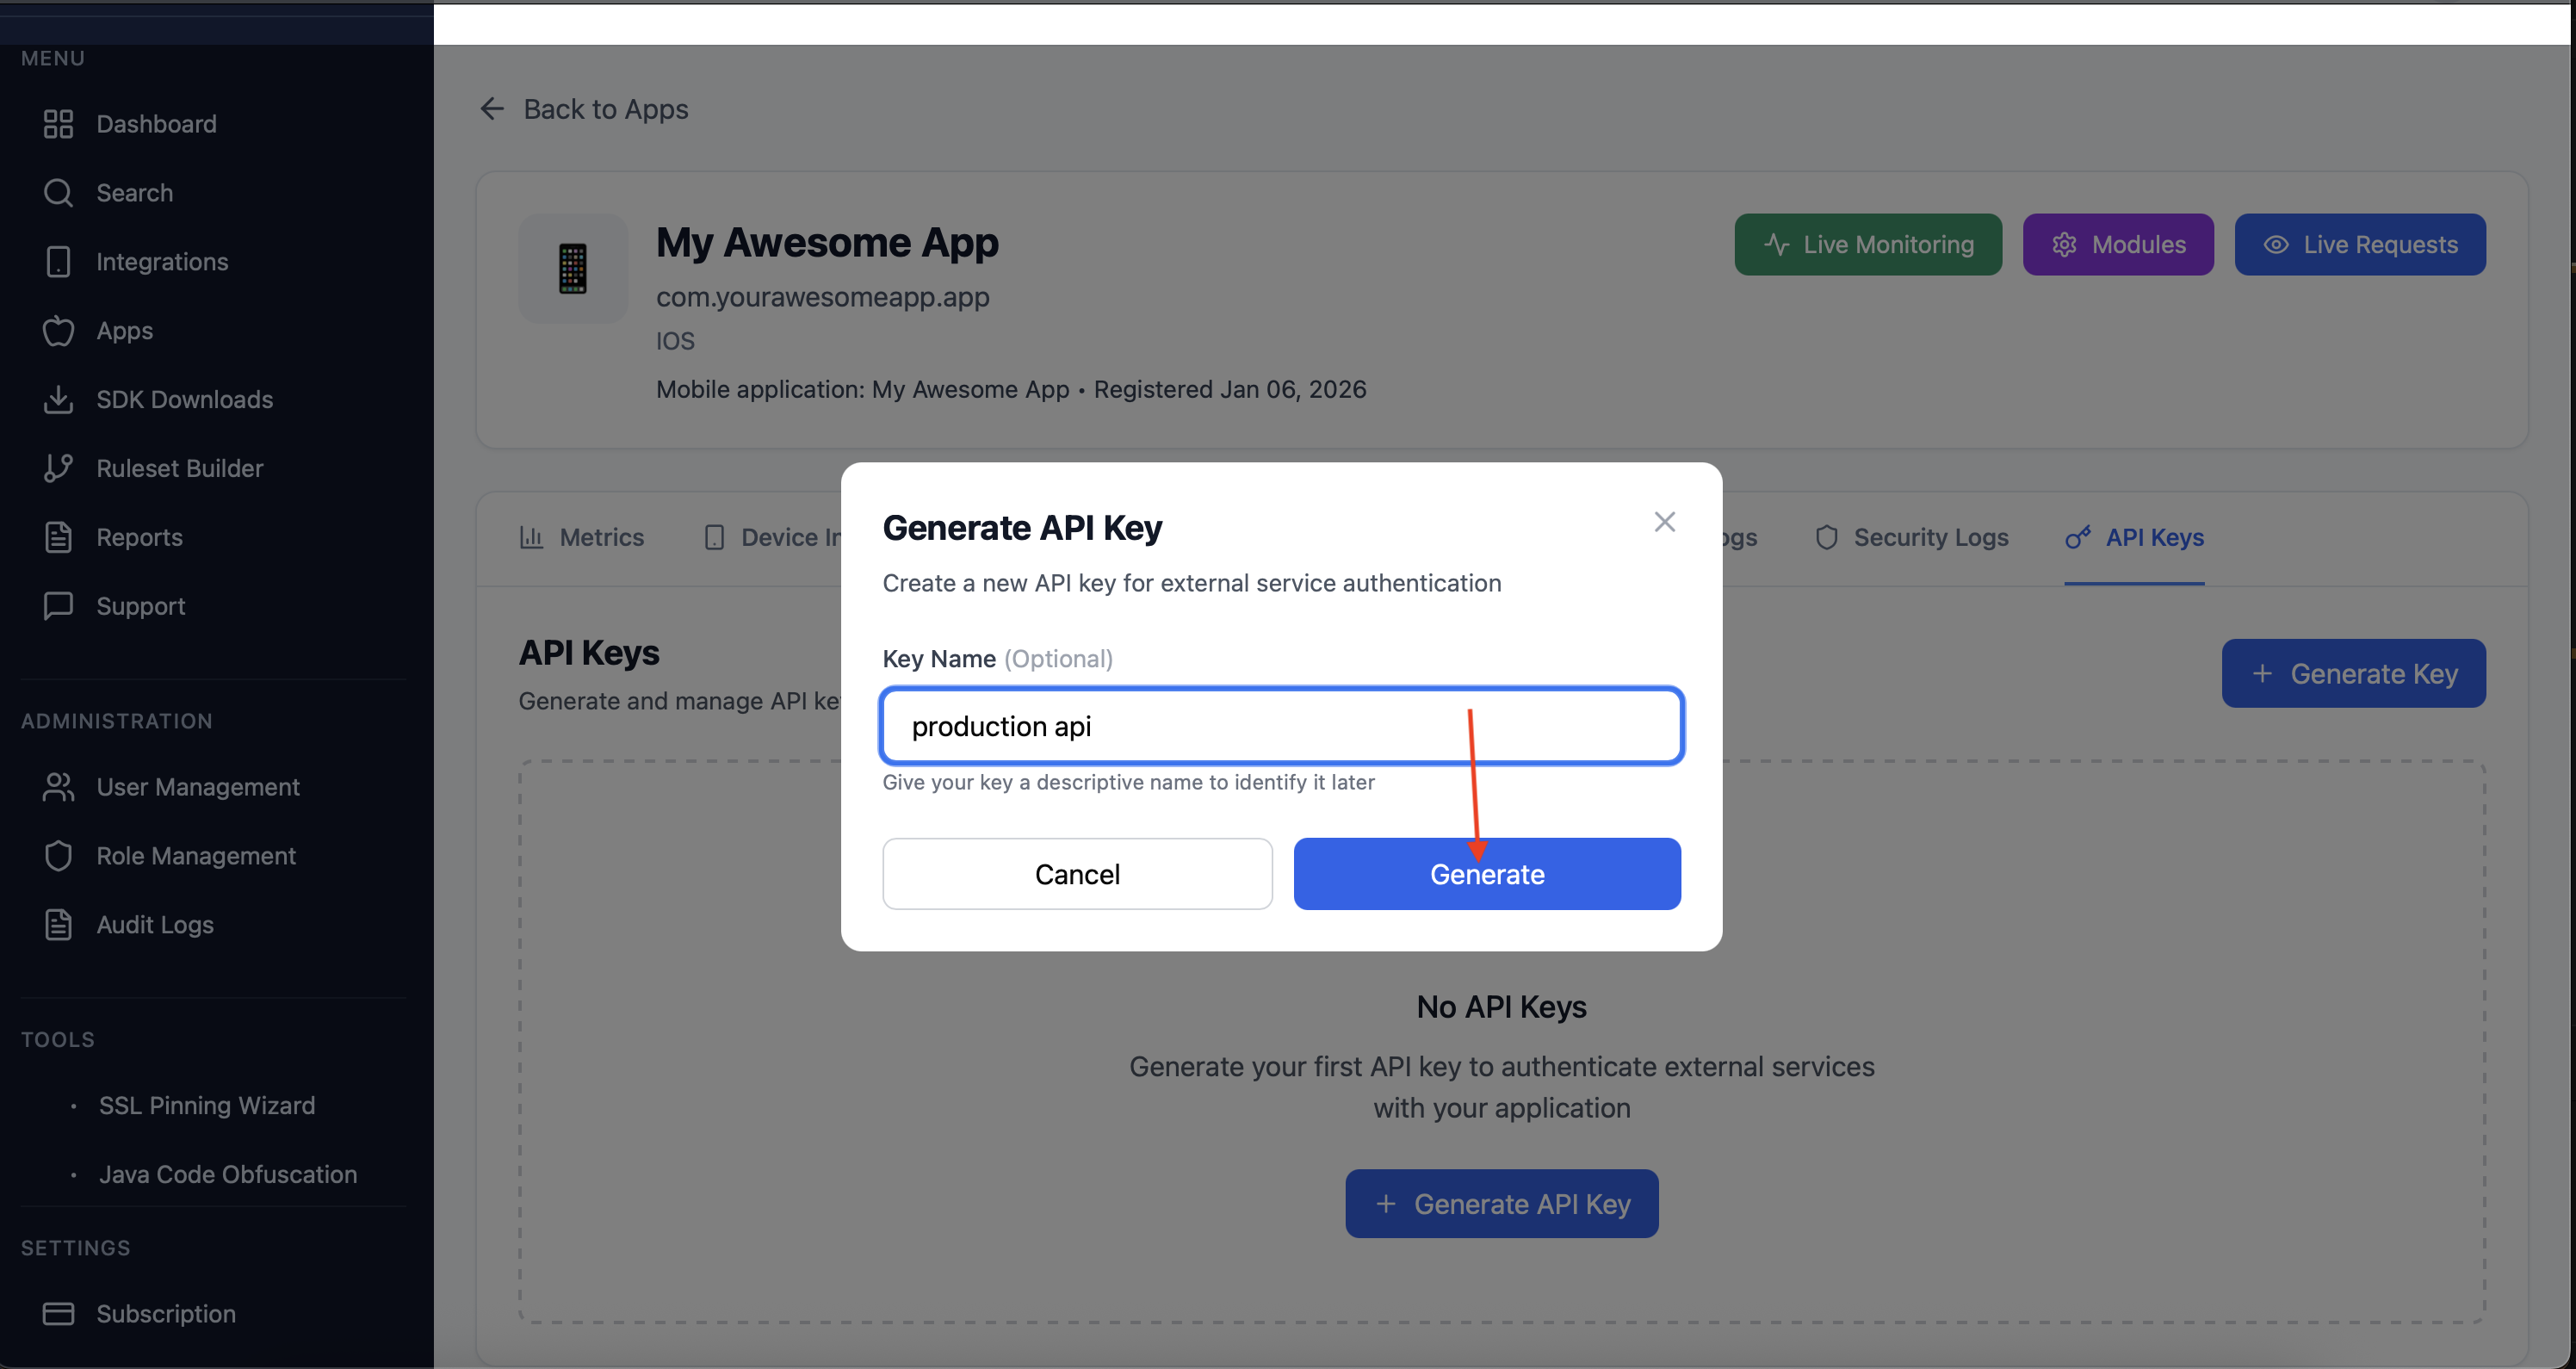
Naming Suggestions
Section titled “Naming Suggestions”iOS - ProductioniOS - StagingAndroid - Production
Note Key names are for your internal organization only, but good naming prevents confusion later.
Step 7: Copy and Save the API Key
Section titled “Step 7: Copy and Save the API Key”- Copy the generated API key.
- Click I’ve saved it, close.
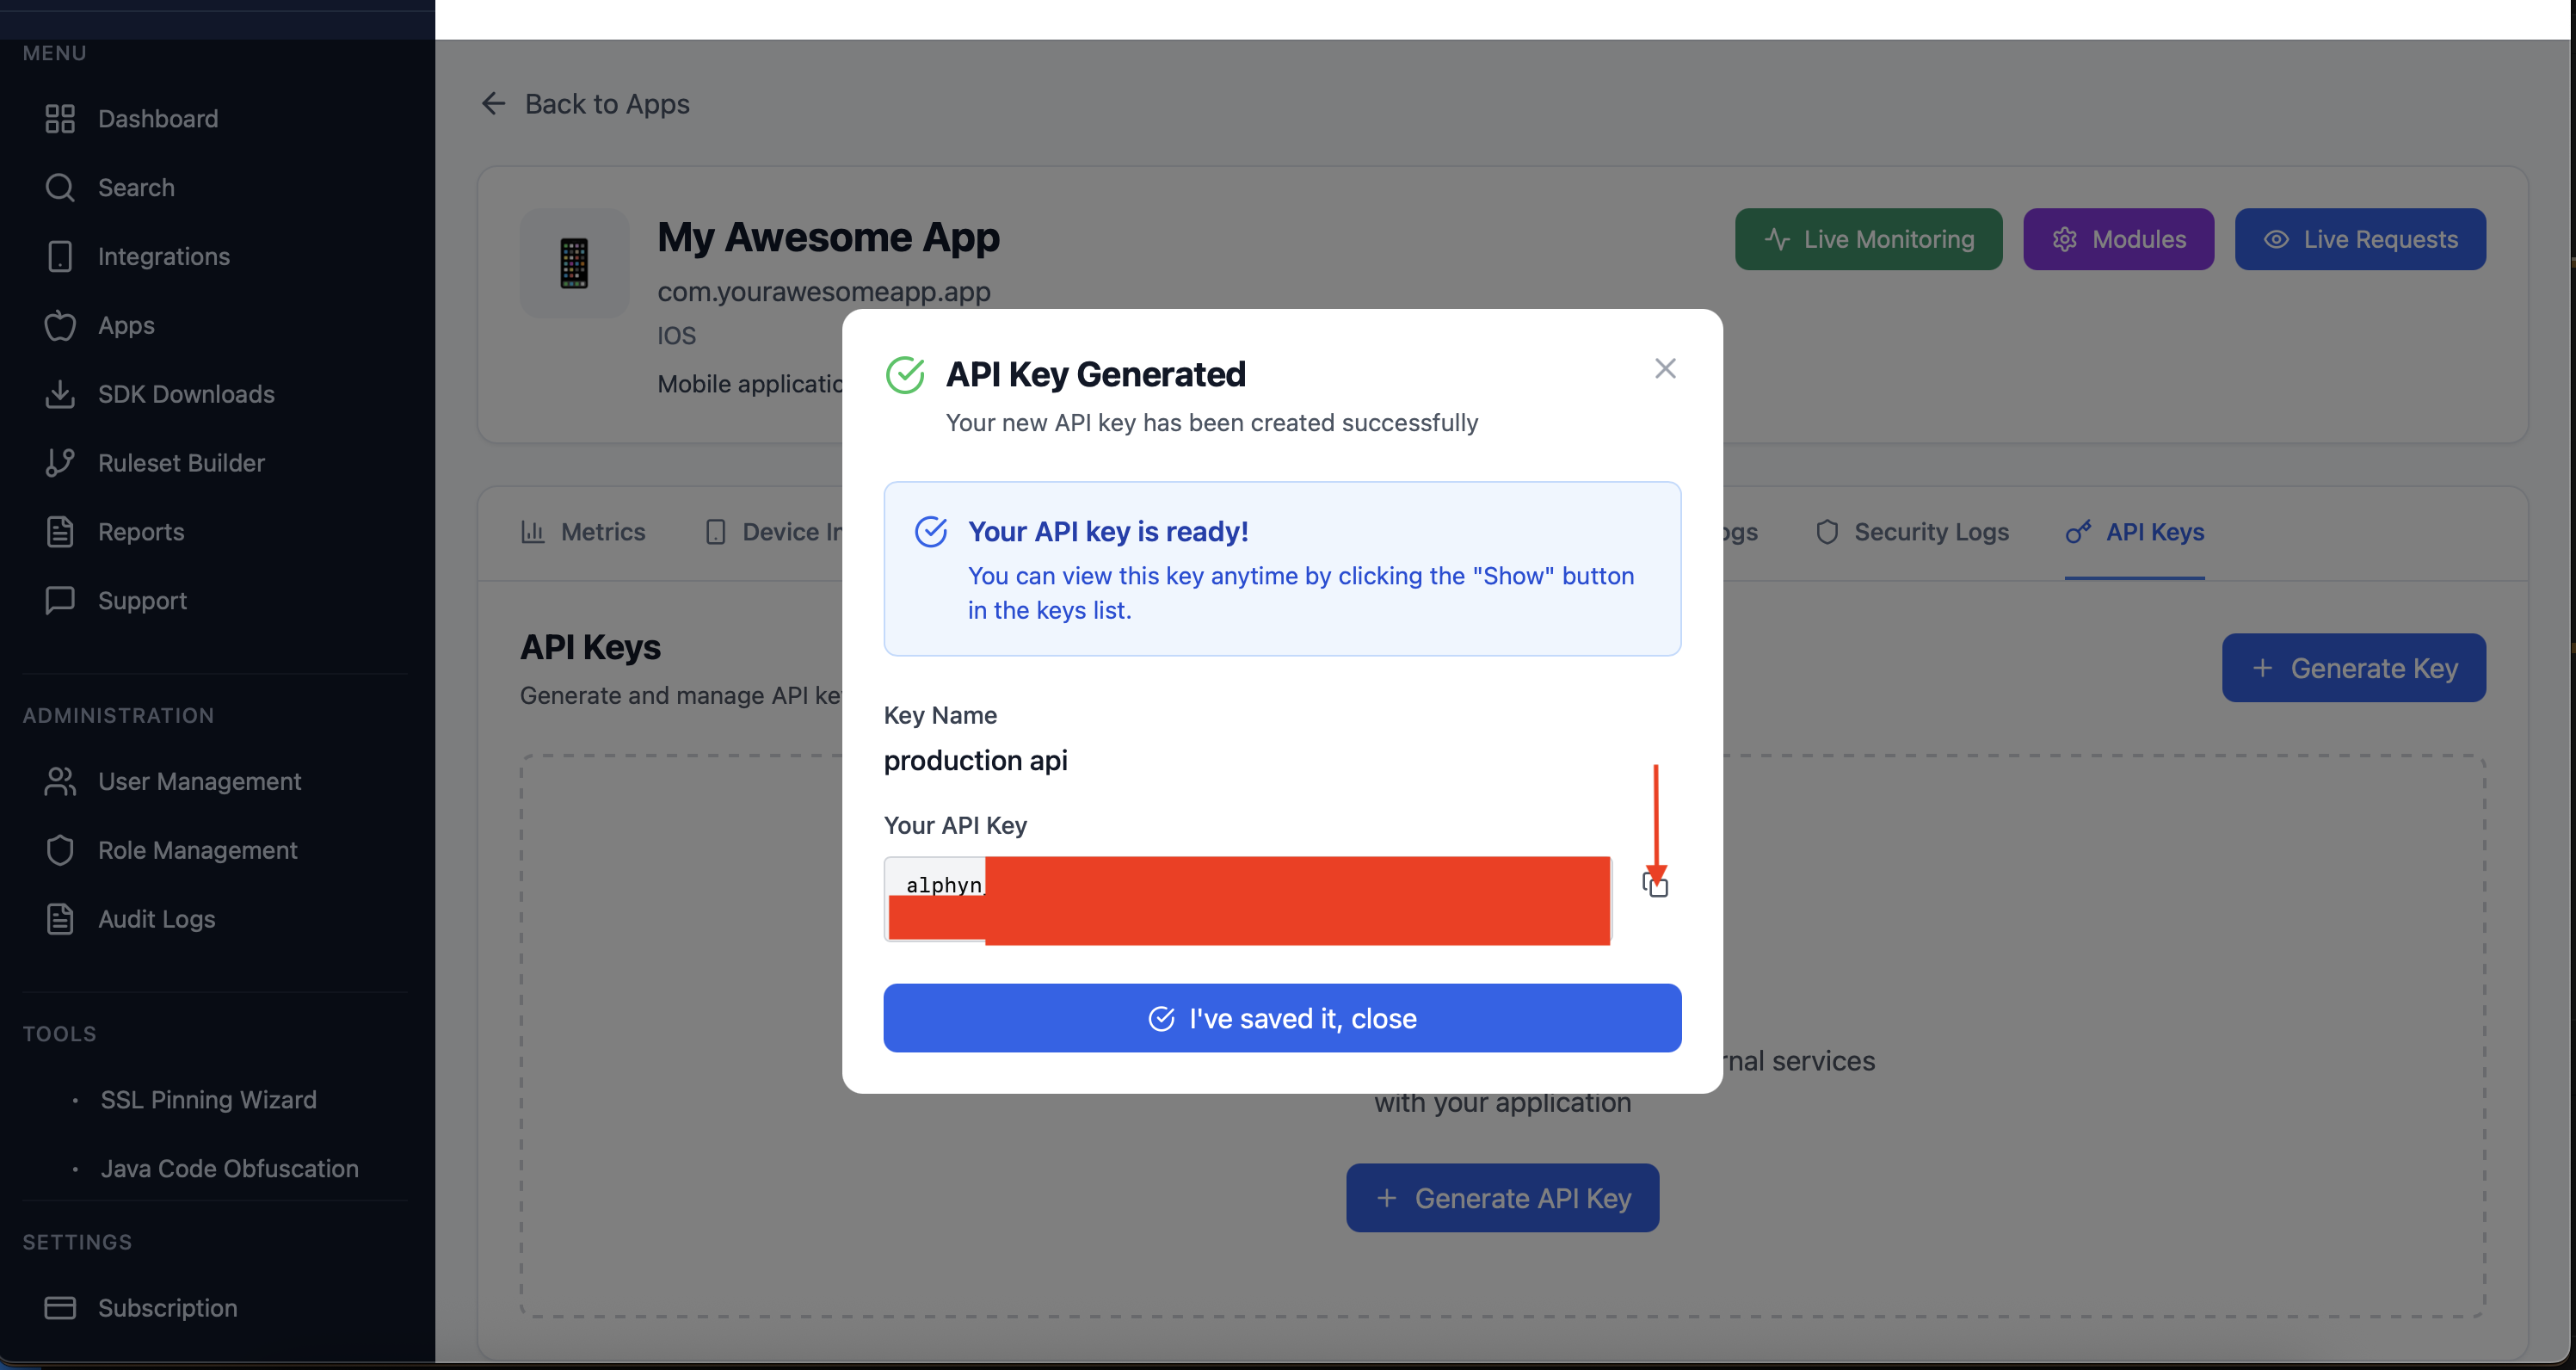
Important Store this key securely. Treat it like a password.
- Do not commit it to Git
- Do not paste it into public tickets or chat channels
Expected result: Dialog closes after confirmation.
Step 8: Verify the Key Appears in the List
Section titled “Step 8: Verify the Key Appears in the List”- Confirm the newly created API key is visible on the API keys page.
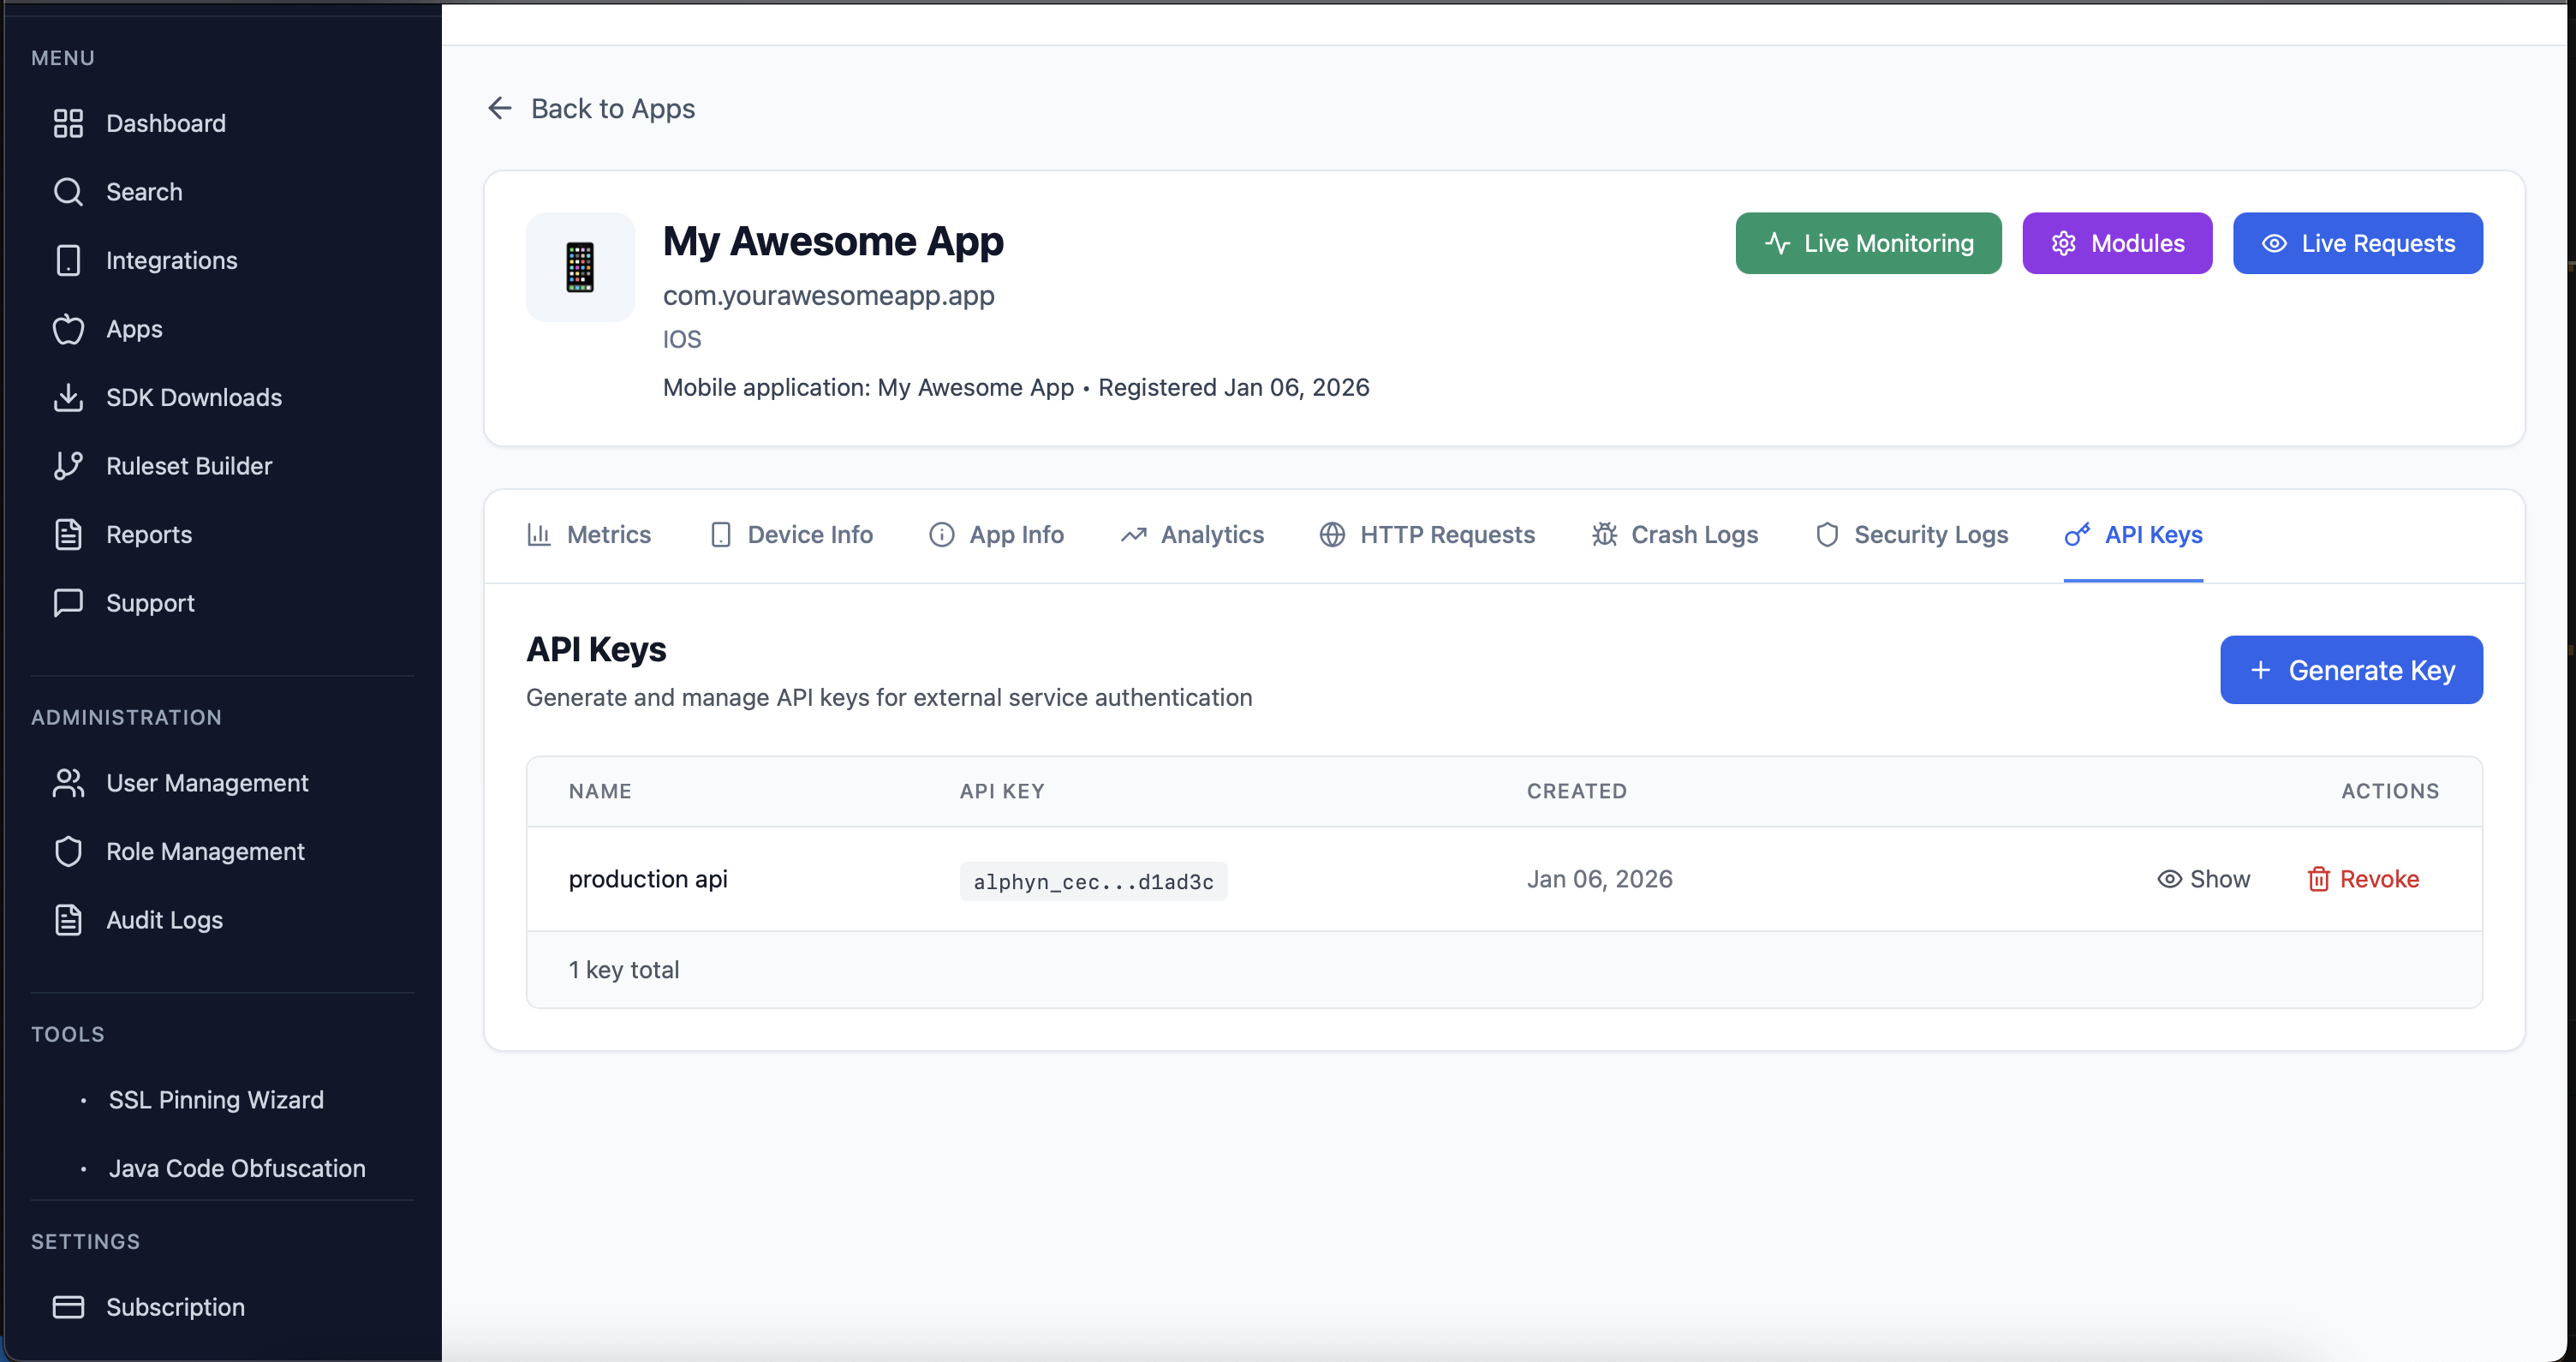
Expected result: Your key appears in the API keys table/list.