
Register your app via XCode Post-action script
Prerequisites
Section titled “Prerequisites”- An Apple Developer Program account
- Your app’s source code
- XCode 13+
- macOS 11.3+
Step 1: Open Your App in Xcode
Section titled “Step 1: Open Your App in Xcode”- Open your iOS app project in Xcode.
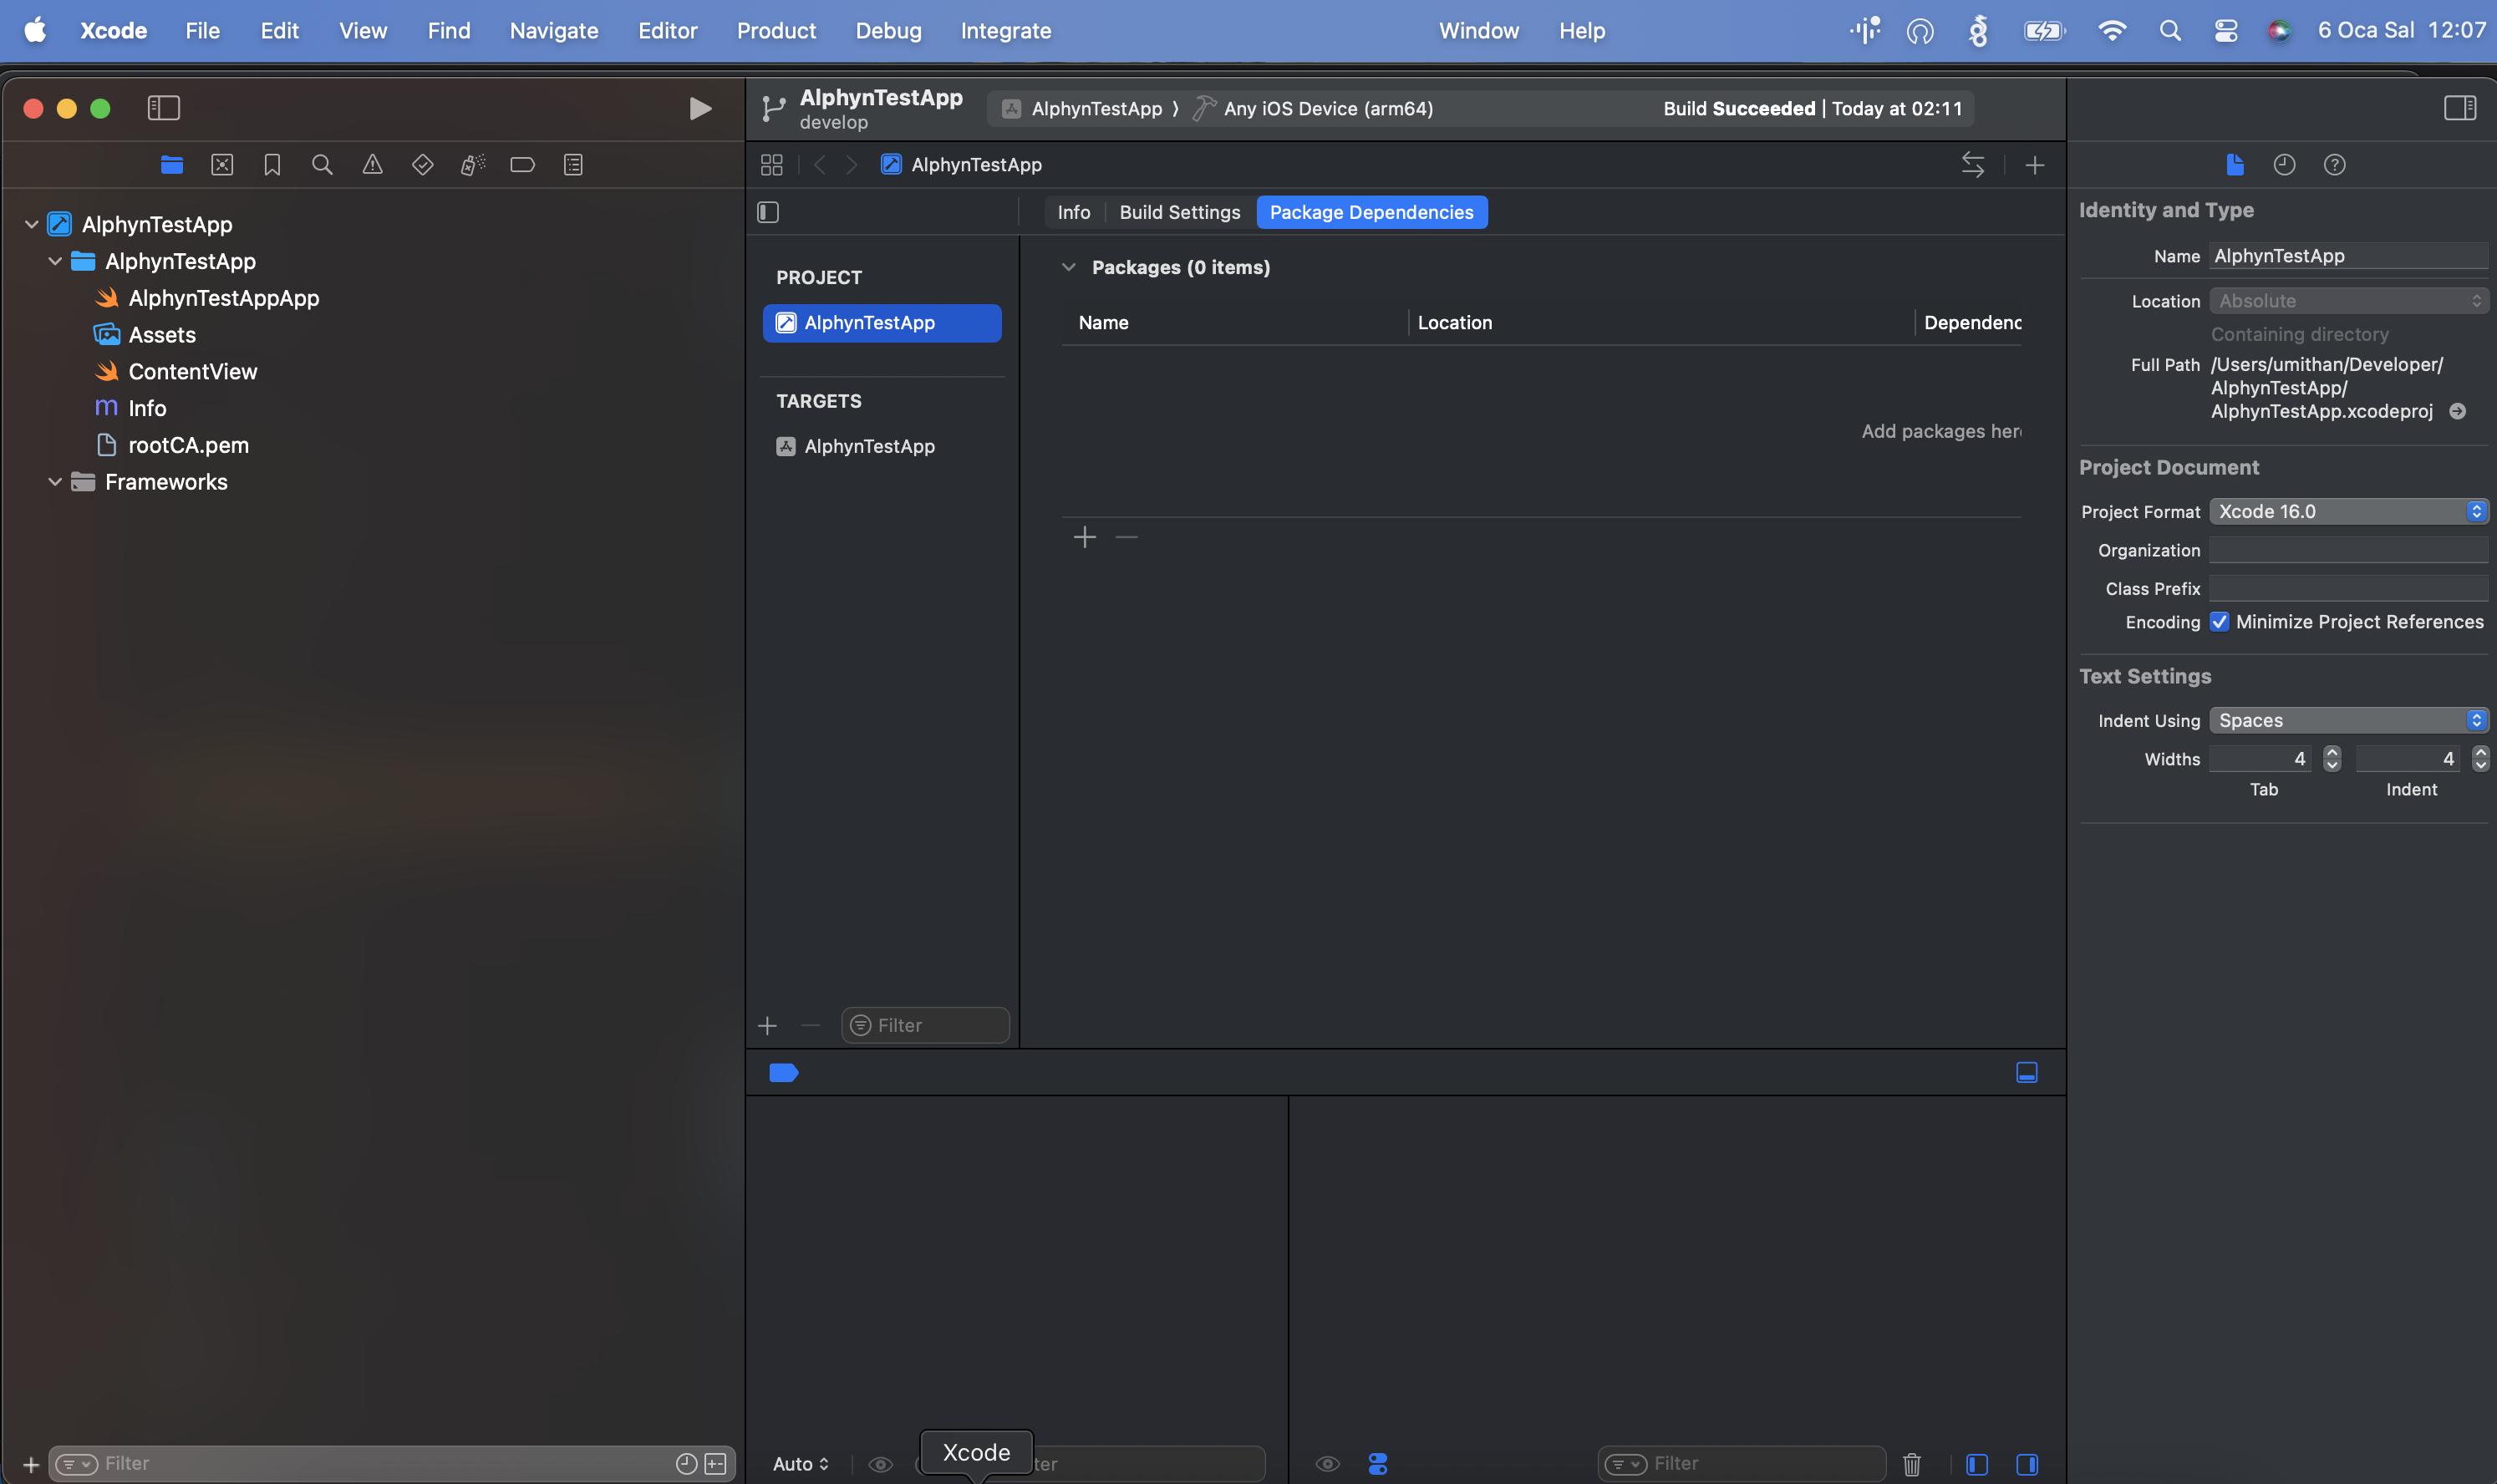
Expected result: Project loads successfully and you can build/run normally.
Step 2: Open Scheme Settings
Section titled “Step 2: Open Scheme Settings”- From the top menu, follow: Product > Scheme > Edit Scheme…
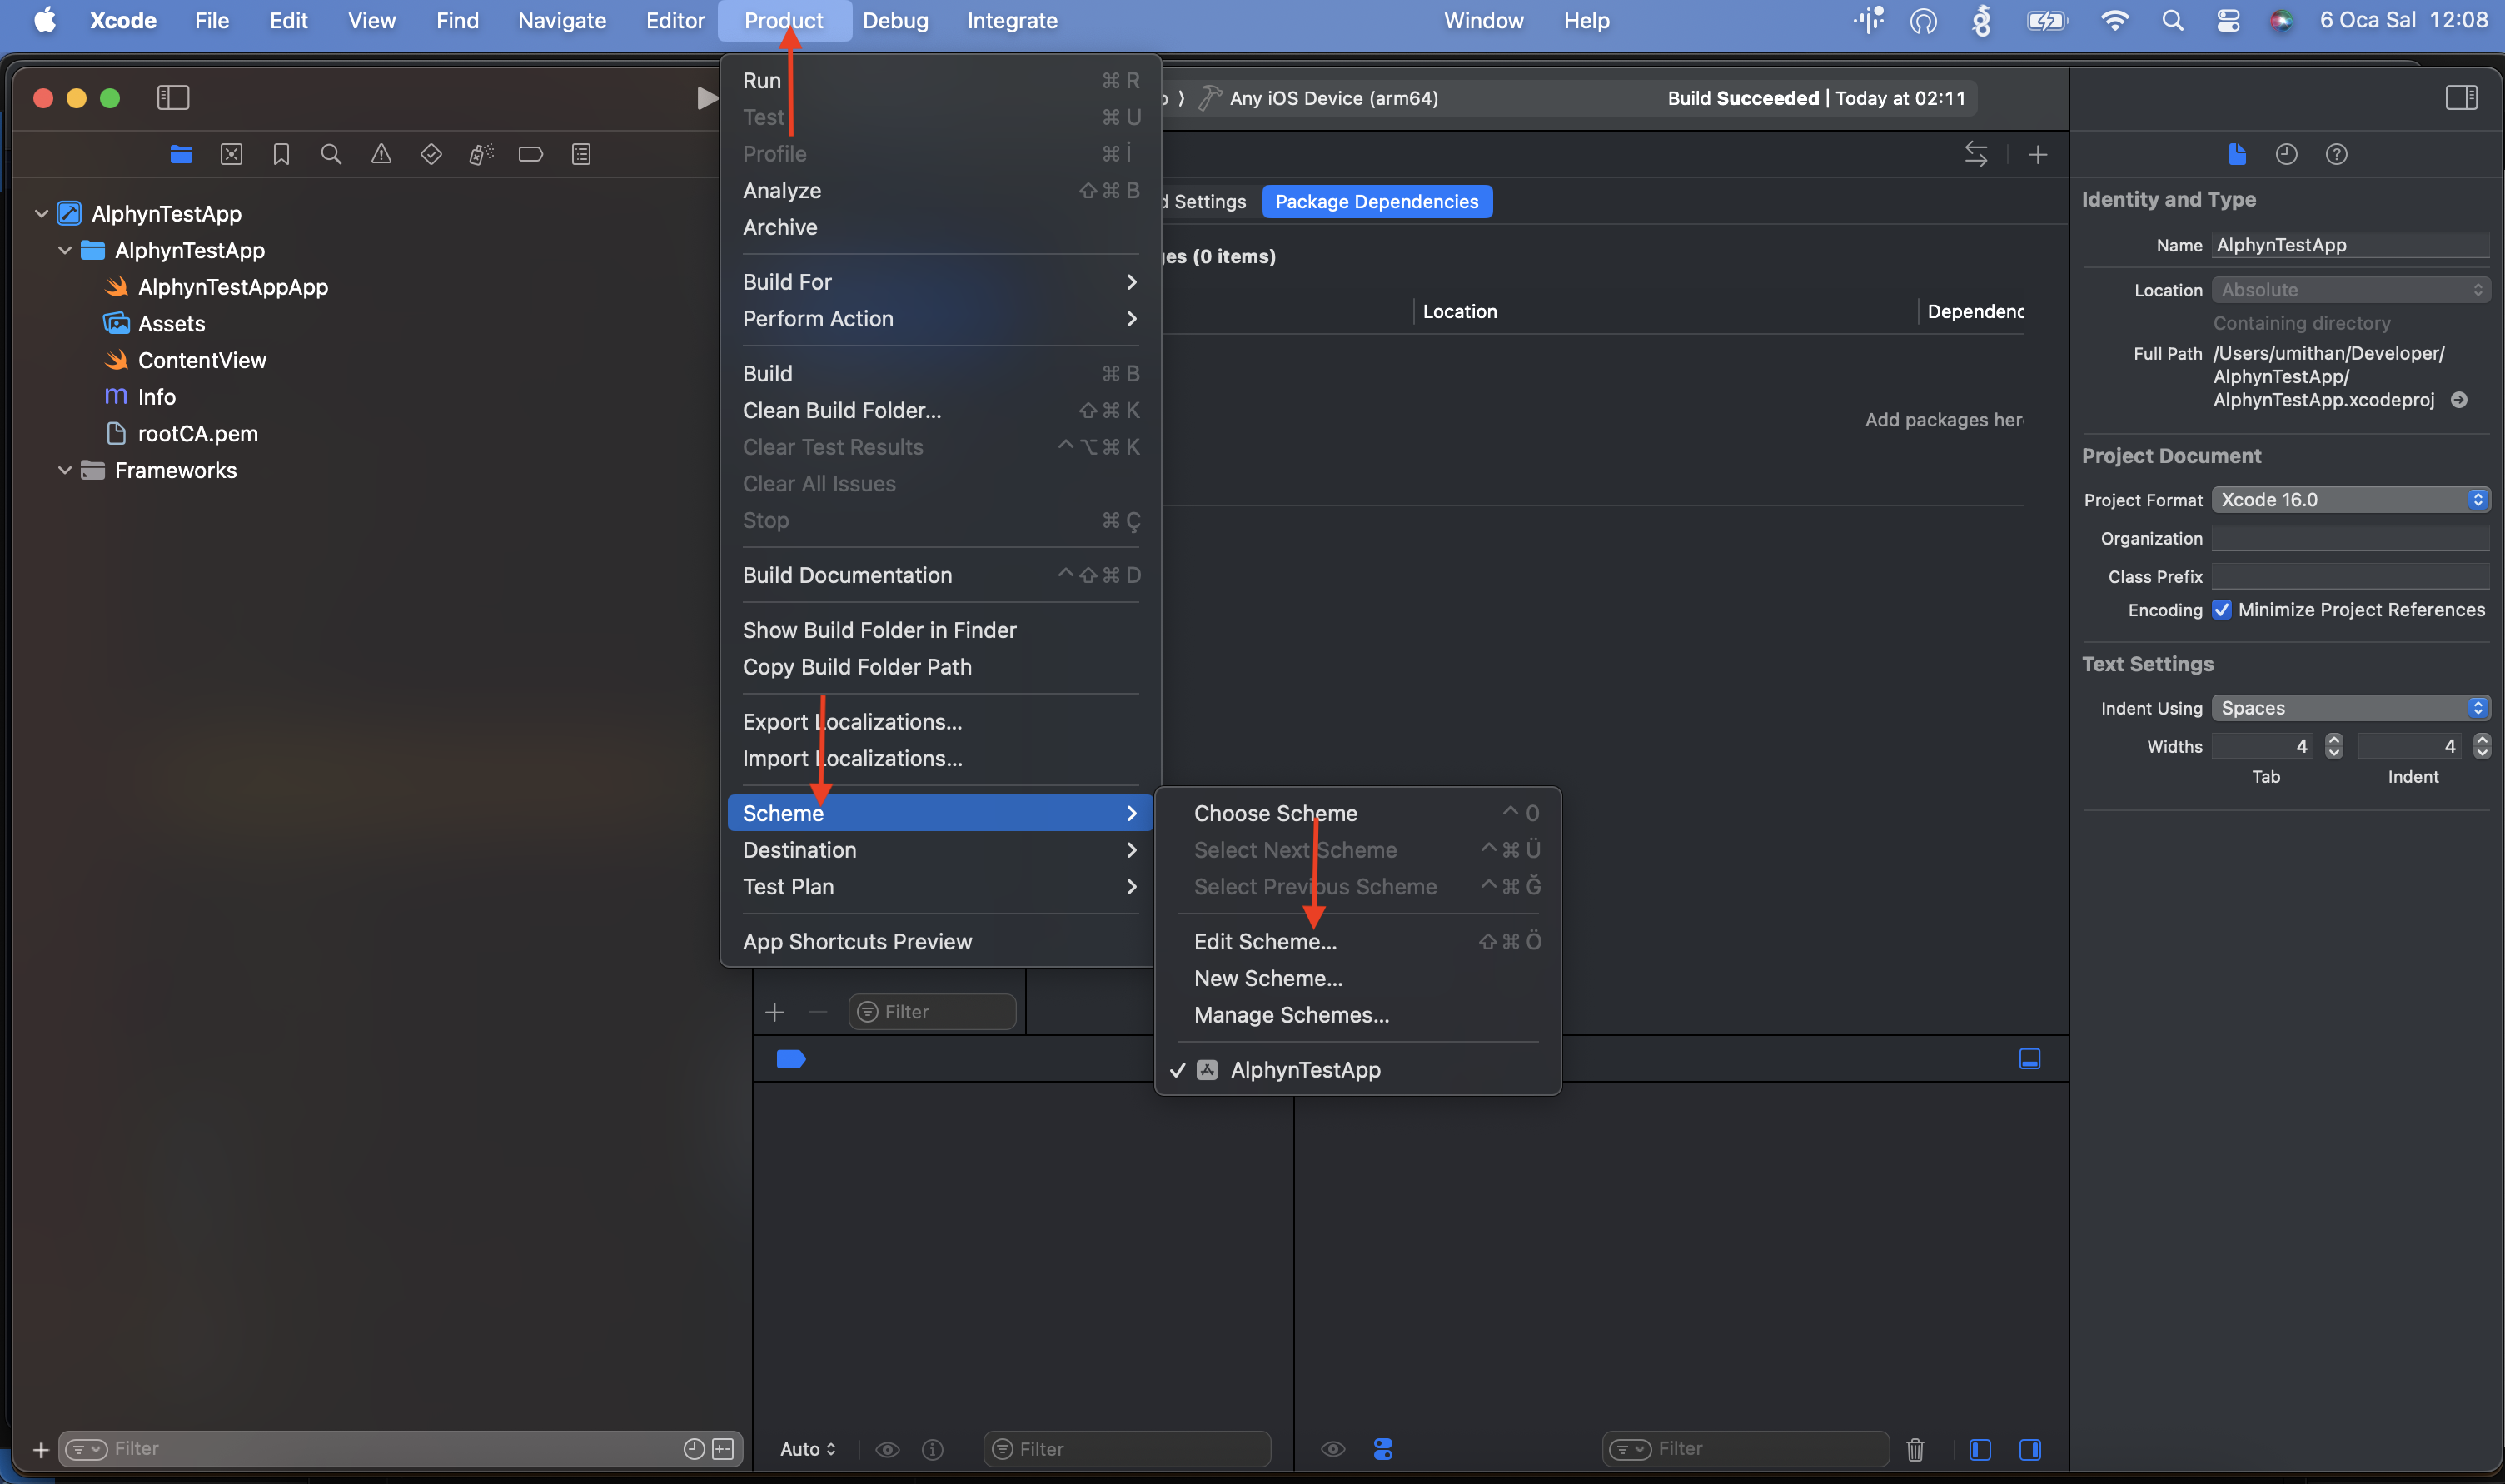
Expected result: The Scheme editor window opens.
Step 3: Go to Post-actions
Section titled “Step 3: Go to Post-actions”- In the left panel, select Archive.
- Click Post-actions.
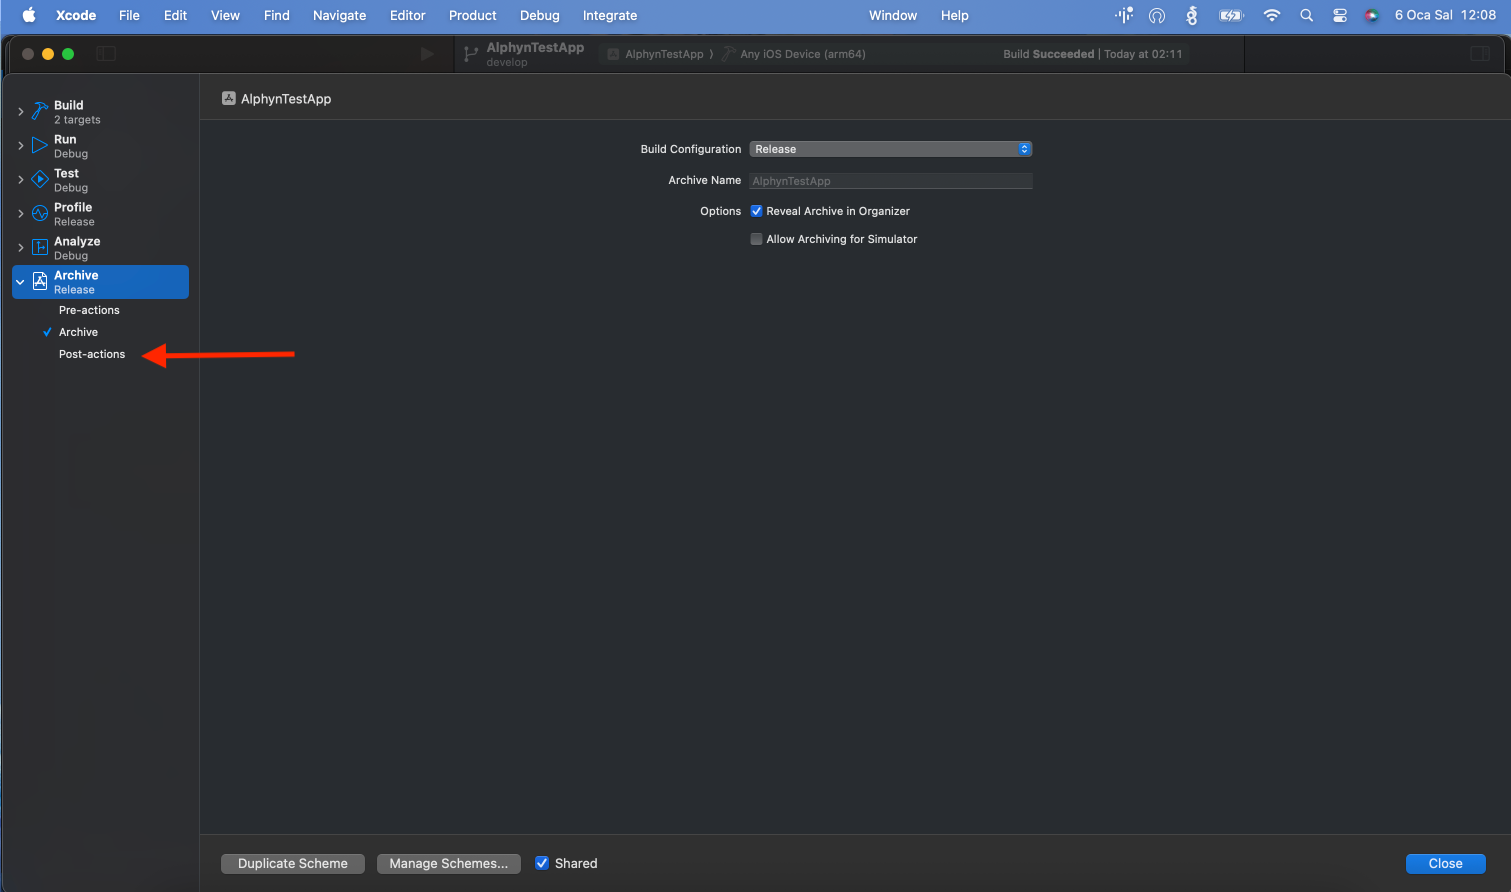
Expected result: You should see the Post-actions panel for the Archive action.
Step 4: Add a New Run Script Action
Section titled “Step 4: Add a New Run Script Action”- Click the ”+” icon (bottom-left).
- Select New Run Script Action.
- Set Shell to
/bin/bash. - Check “Provide build settings from” and select your app target.
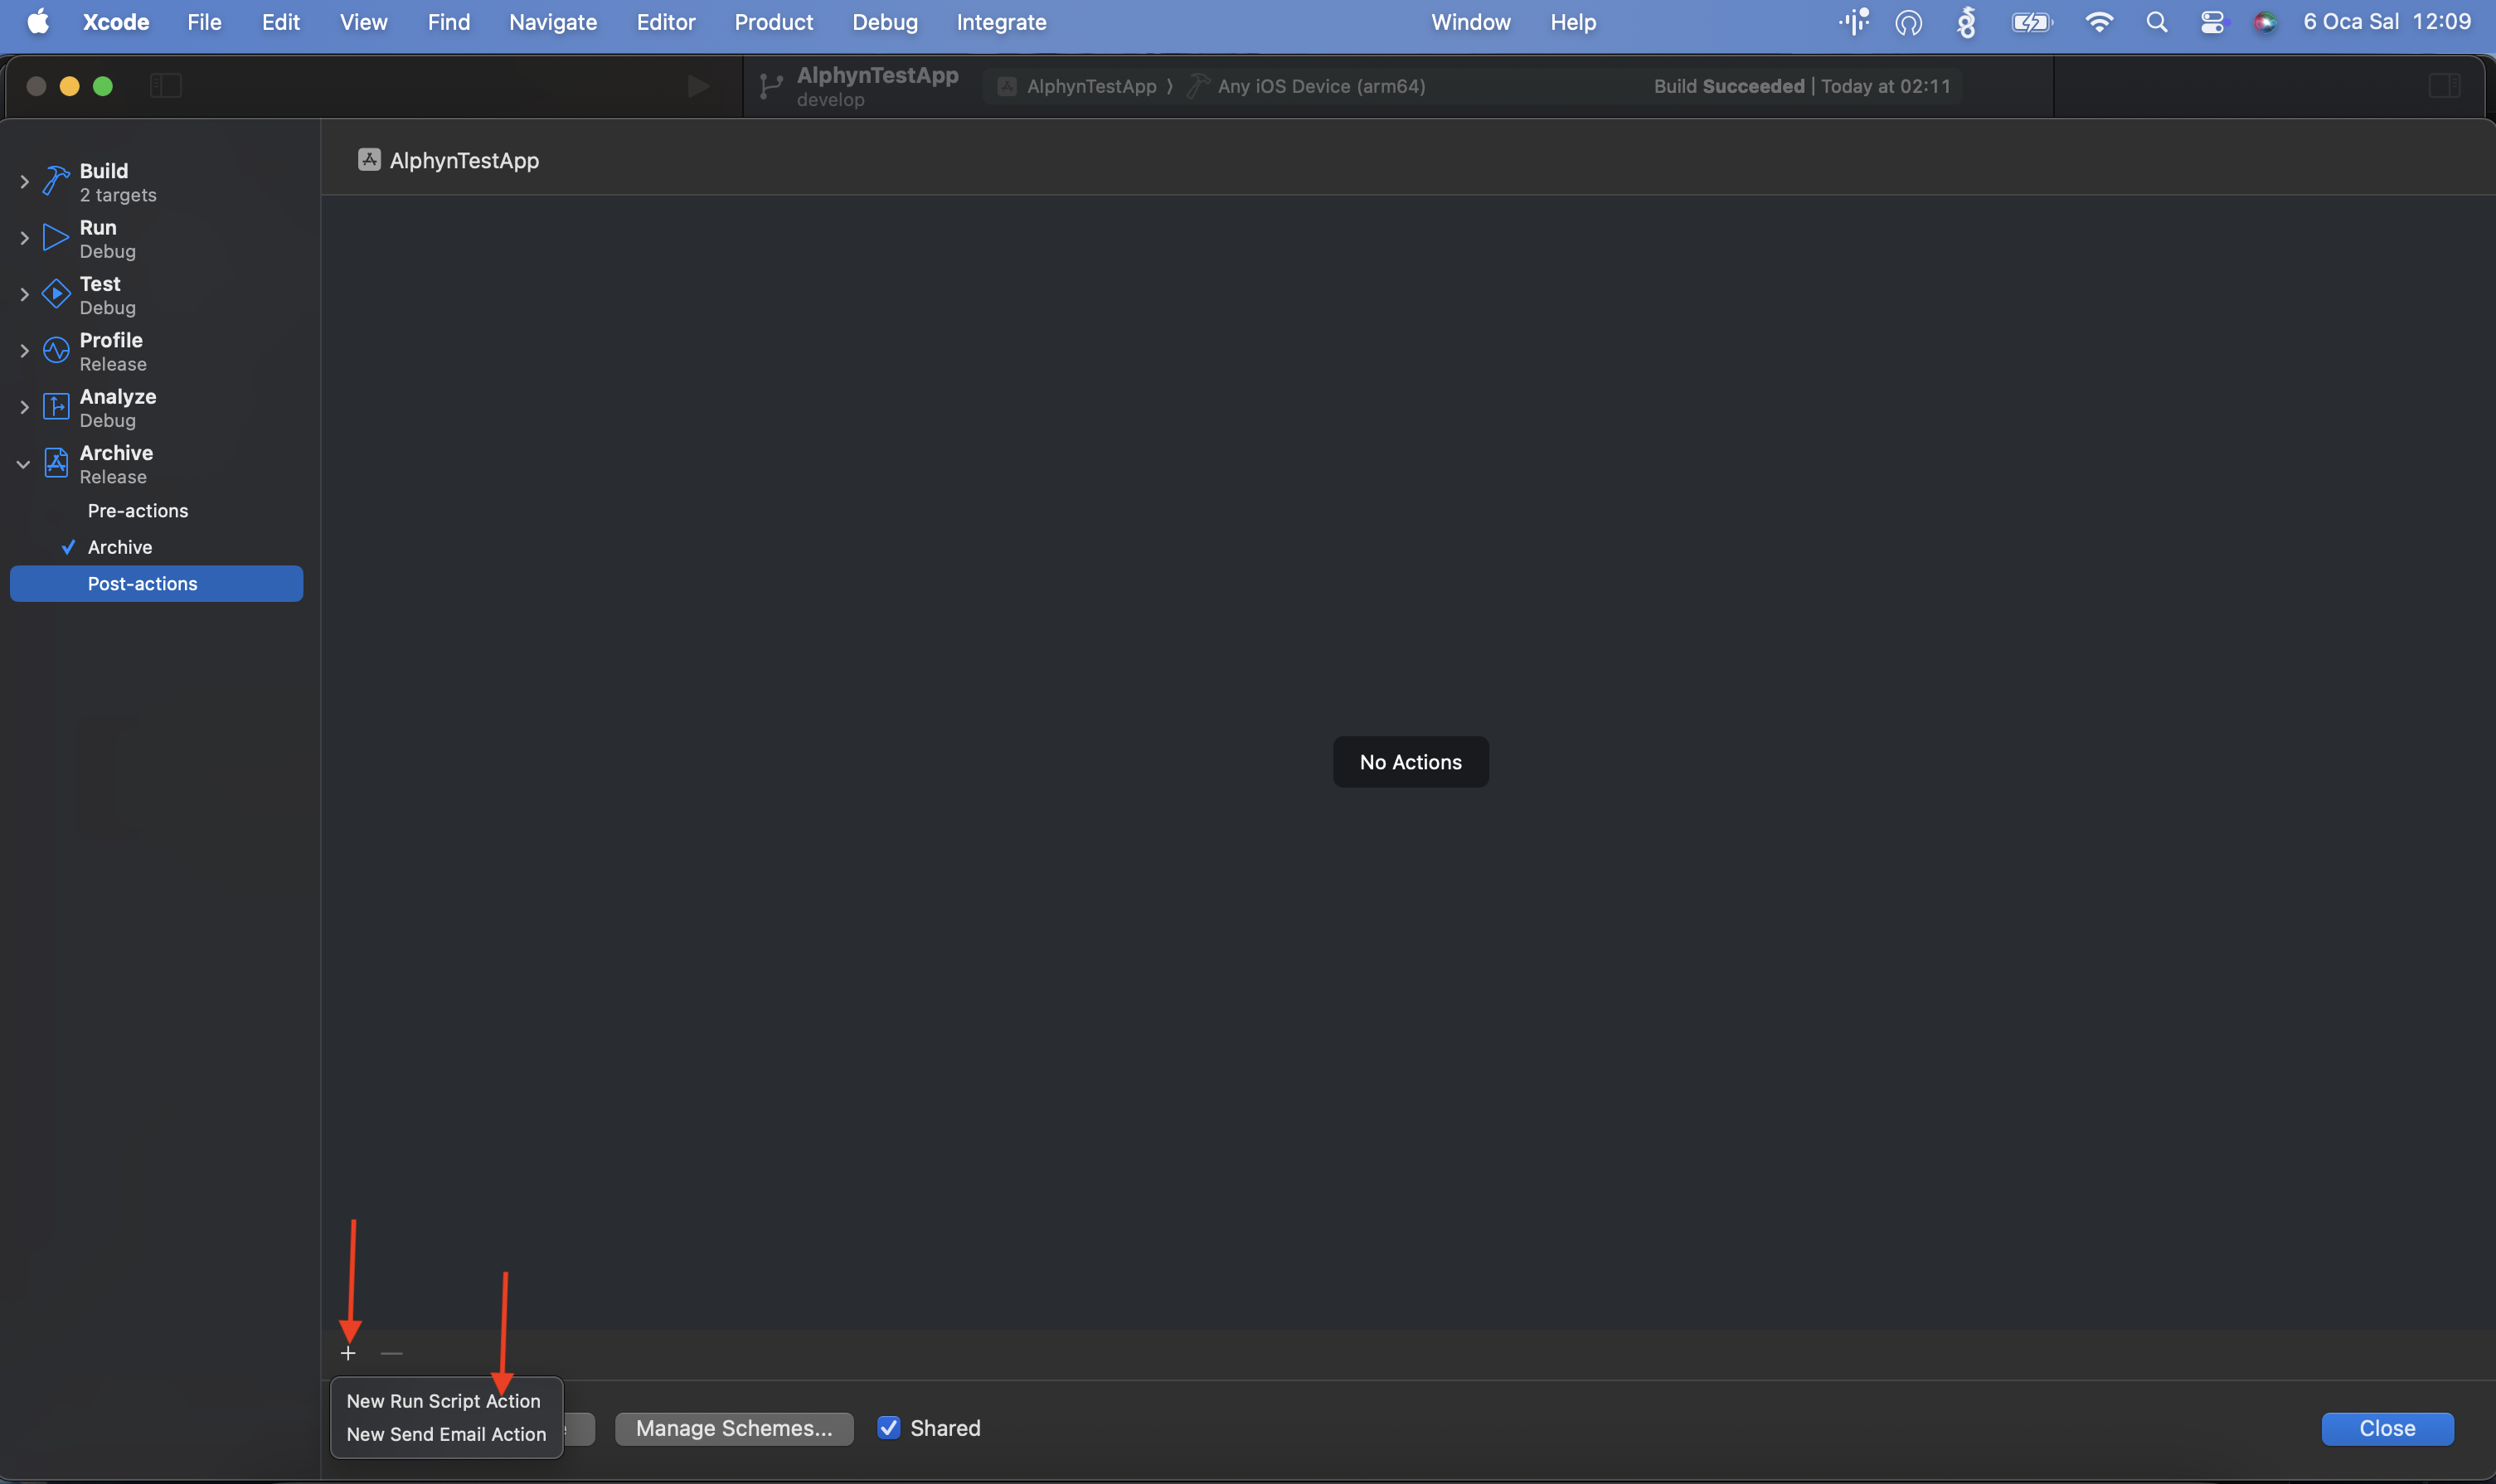
Important: “Provide build settings from” must be set to your app target. The script relies on build settings such as
ARCHIVE_PATH; without this, the post-action exits without registering the build.
Expected result: A new run script action appears, with the shell set to /bin/bash and build settings provided by your app target.
Step 5: Paste the Post-Action Script and Set Your API Key
Section titled “Step 5: Paste the Post-Action Script and Set Your API Key”- Paste the provided post_action_script into the script editor.
- Near the top of the script, replace the API key placeholder with your actual key:
- Replace:
alphyn_xxx(the value ofAUTH_TOKEN) - With: your real API key from the Portal (it starts with
alphyn_)
Important
- Do not remove the quote marks.
- Paste the key exactly as provided.
- The key must belong to your iOS app registration (the app whose Platform is iOS and whose package name is this app’s bundle identifier). In a cross-platform (React Native/Flutter/Unity) project the Android app’s key is a different key and is not accepted here.
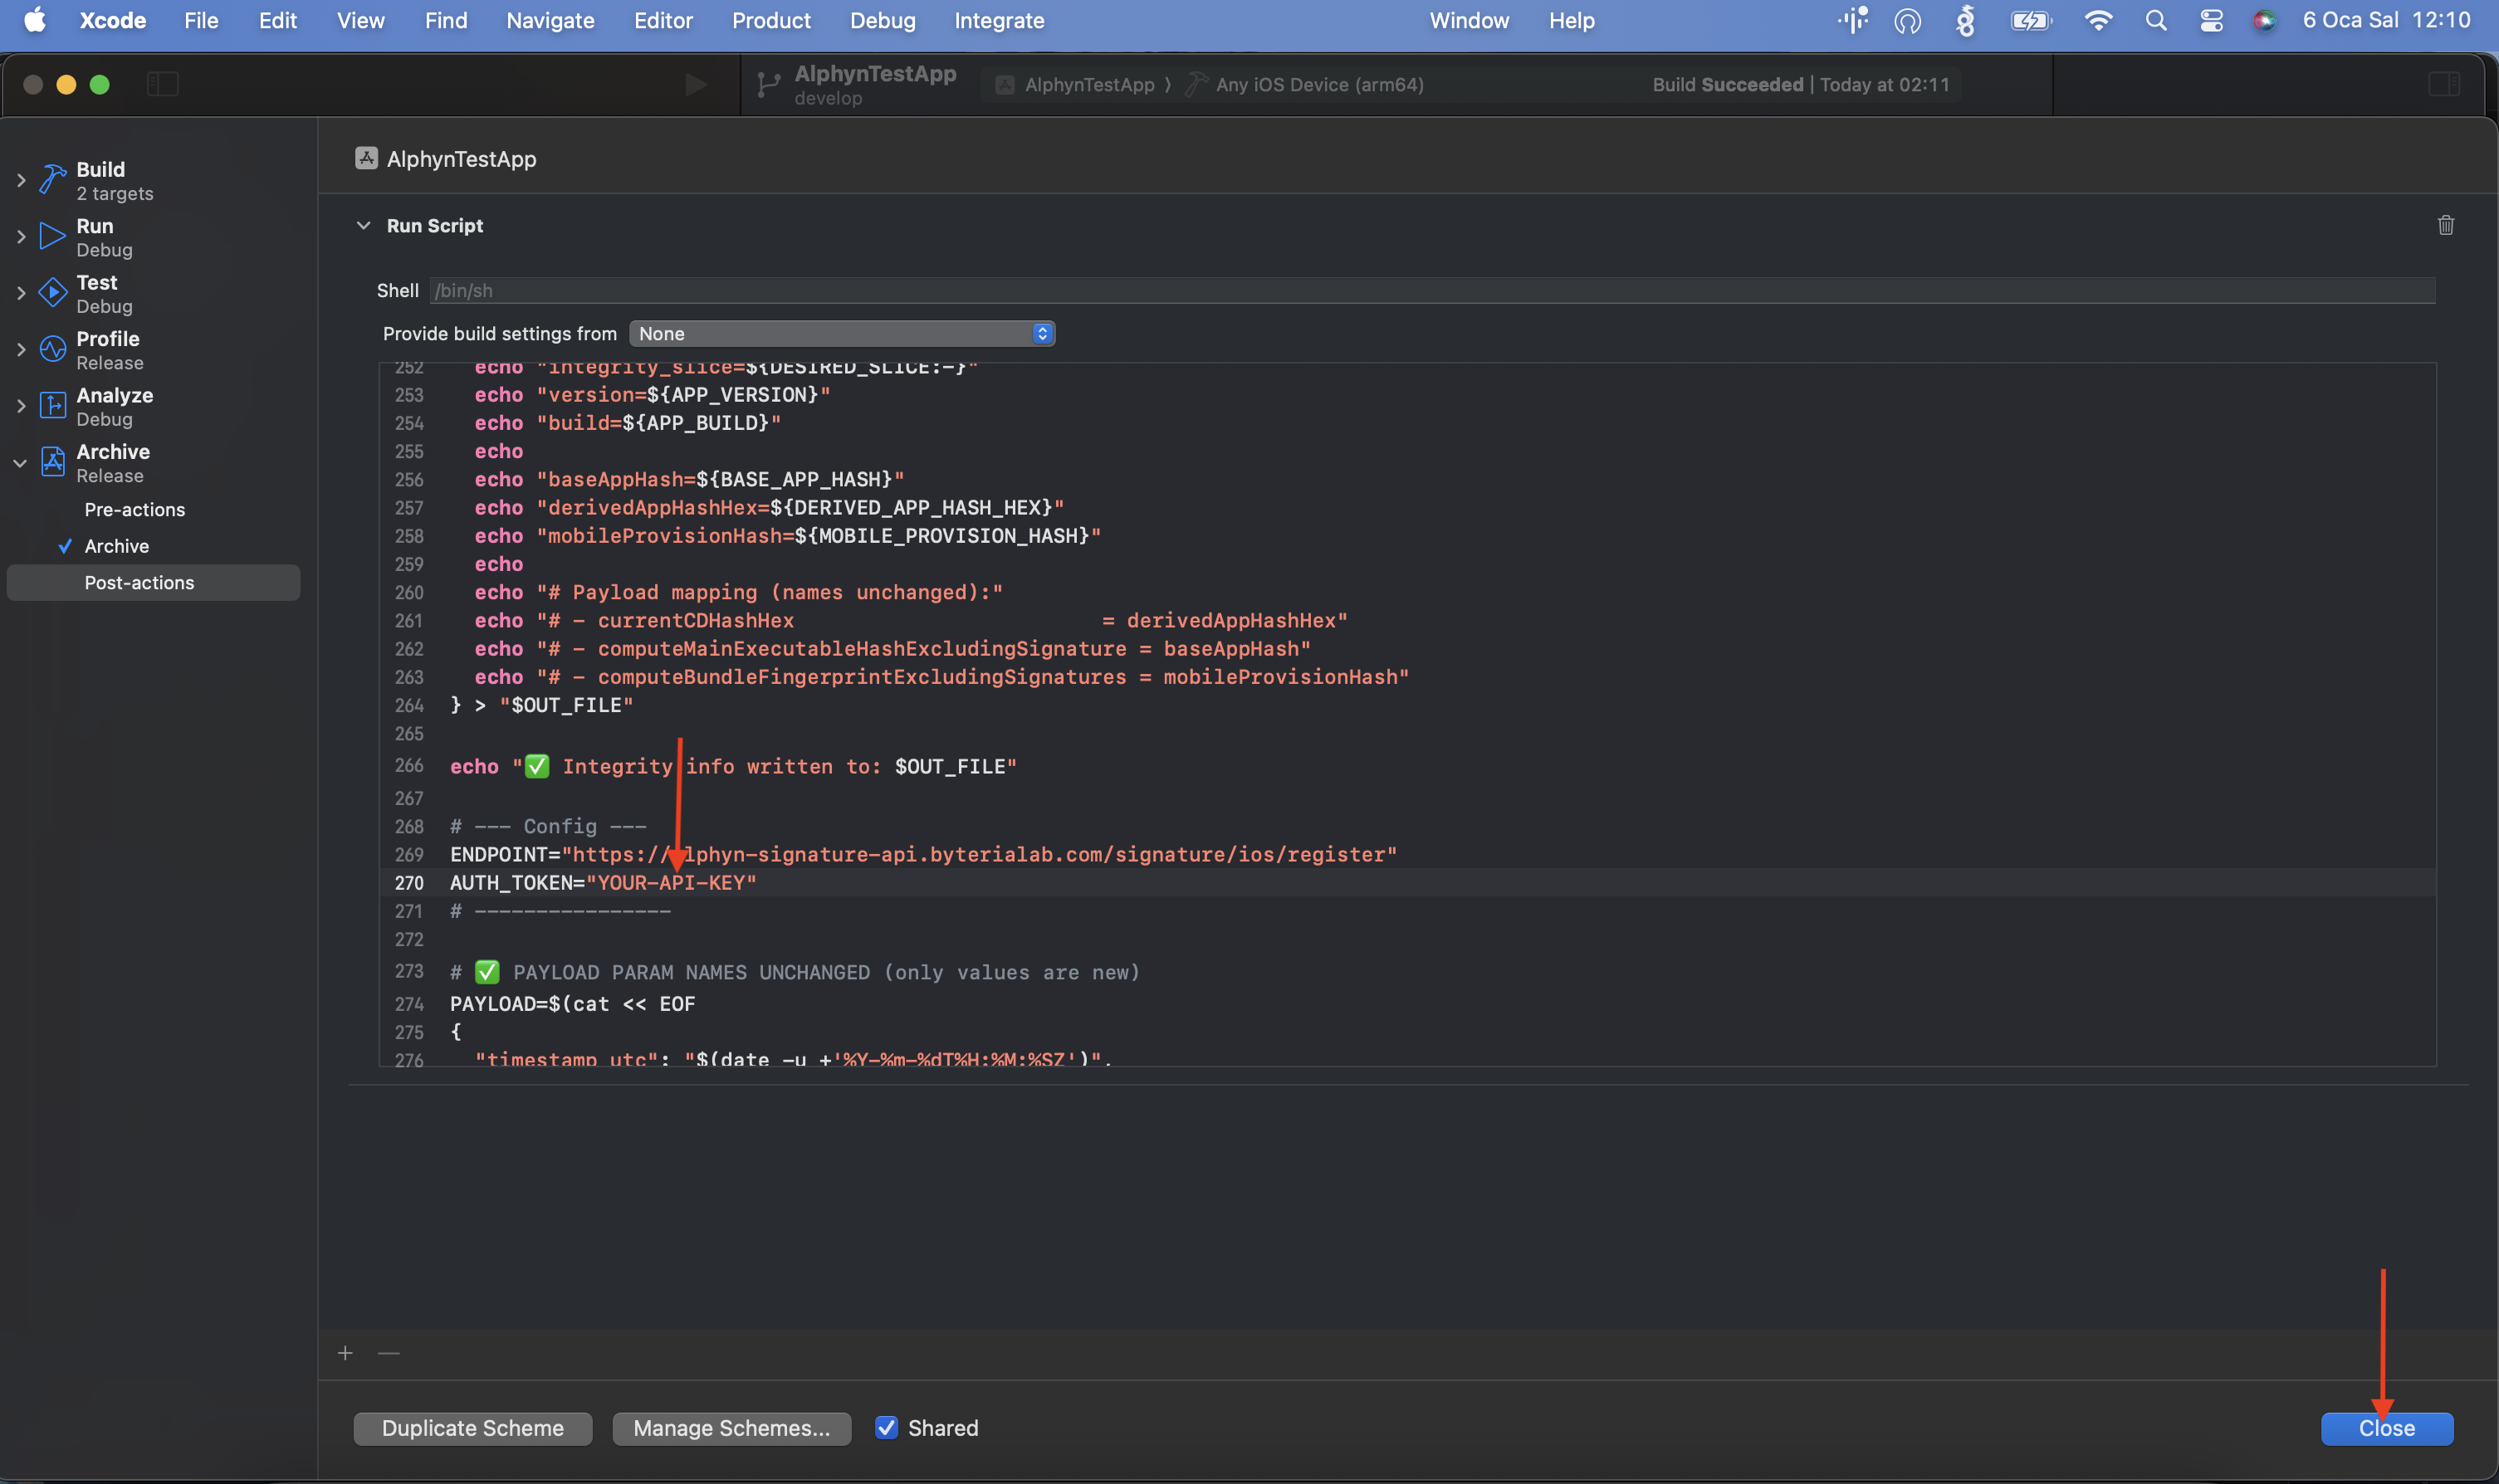
Expected result: Script is saved under Archive > Post-actions and contains your API key.
Step 6: Open Frameworks, Libraries, and Embedded Content
Section titled “Step 6: Open Frameworks, Libraries, and Embedded Content”- In Xcode, open: General > Your App Target > Frameworks, Libraries, and Embedded Content
- Click the ”+” icon at the bottom.
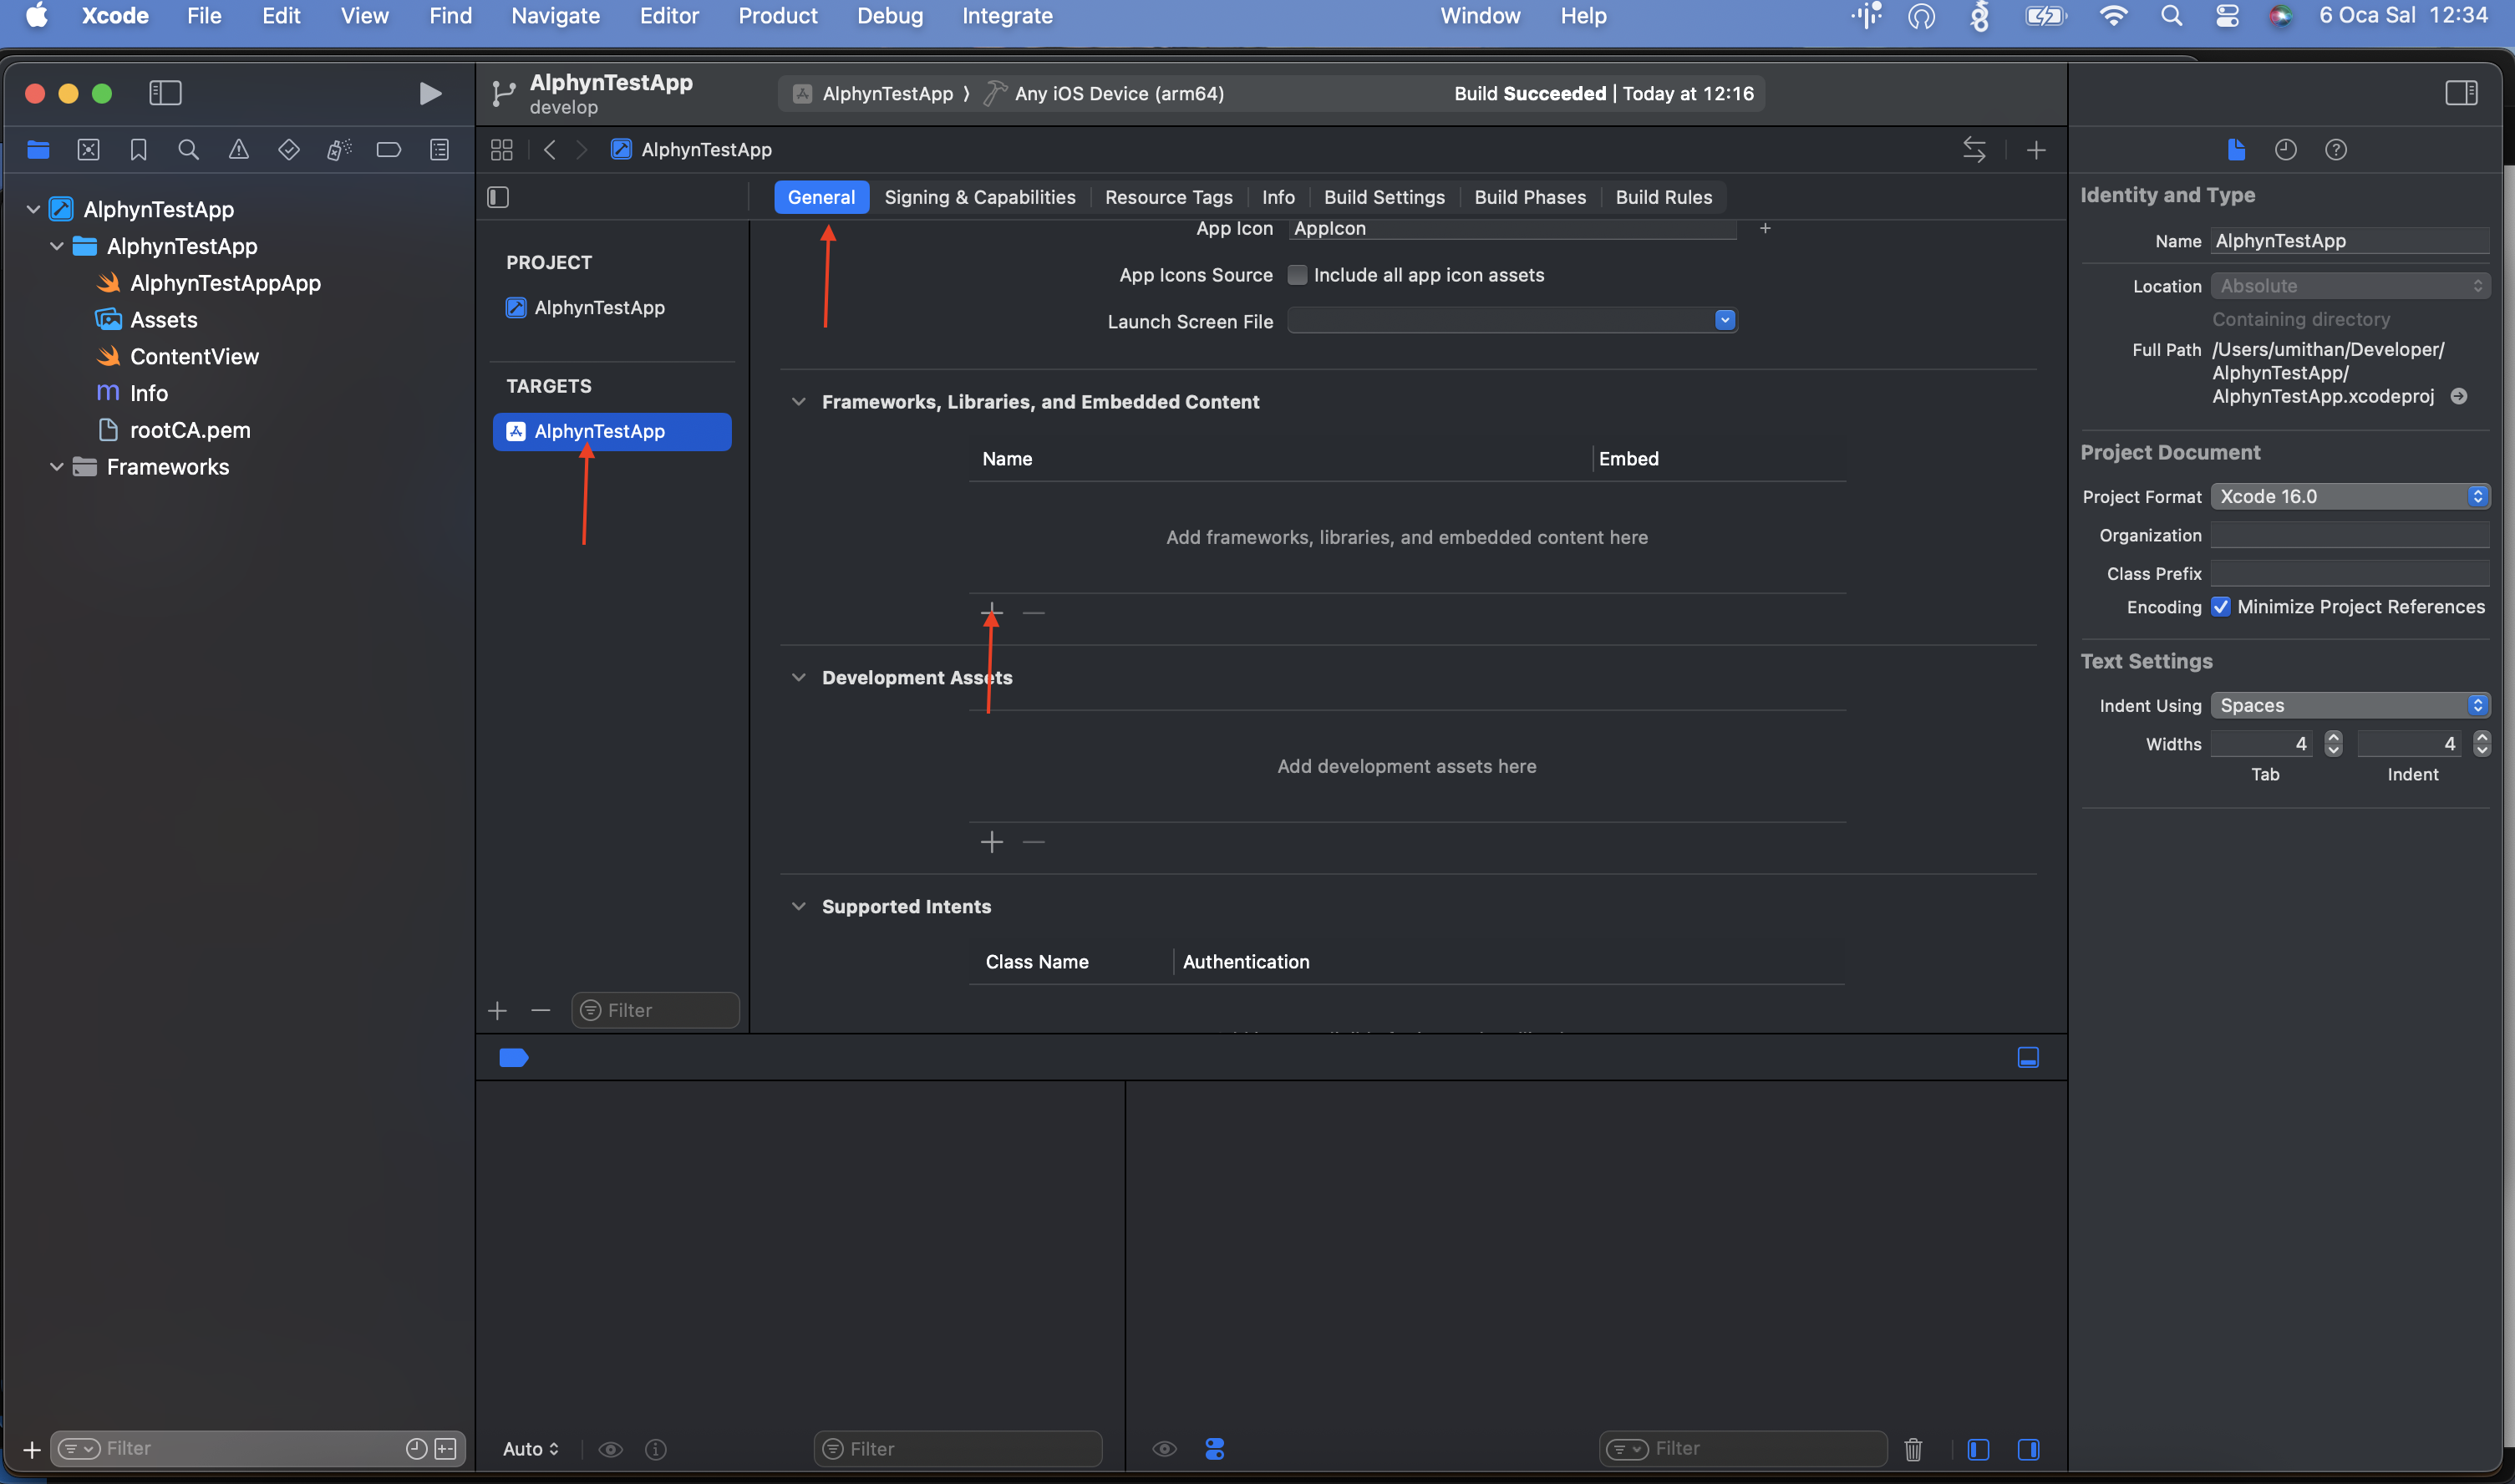
Expected result: The “Add frameworks and libraries” modal opens.
Step 7: Add Files Manually
Section titled “Step 7: Add Files Manually”- Click Add Other.
- Select Add Files…
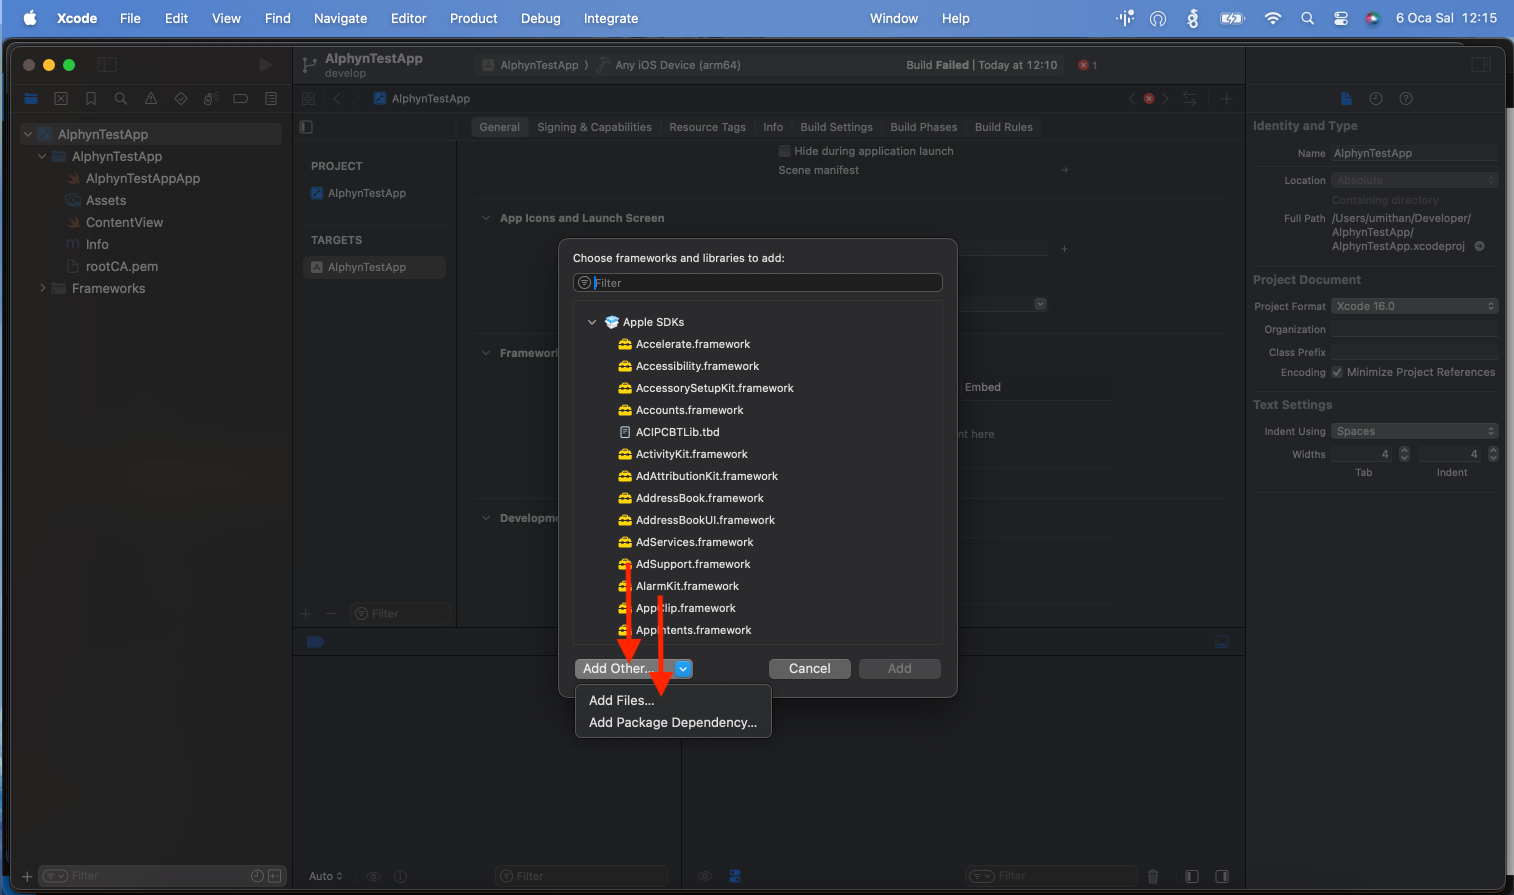
Expected result: File picker opens.
Step 8: Select Alphyn.xcframework
Section titled “Step 8: Select Alphyn.xcframework”- Select Alphyn.xcframework
- Click Open
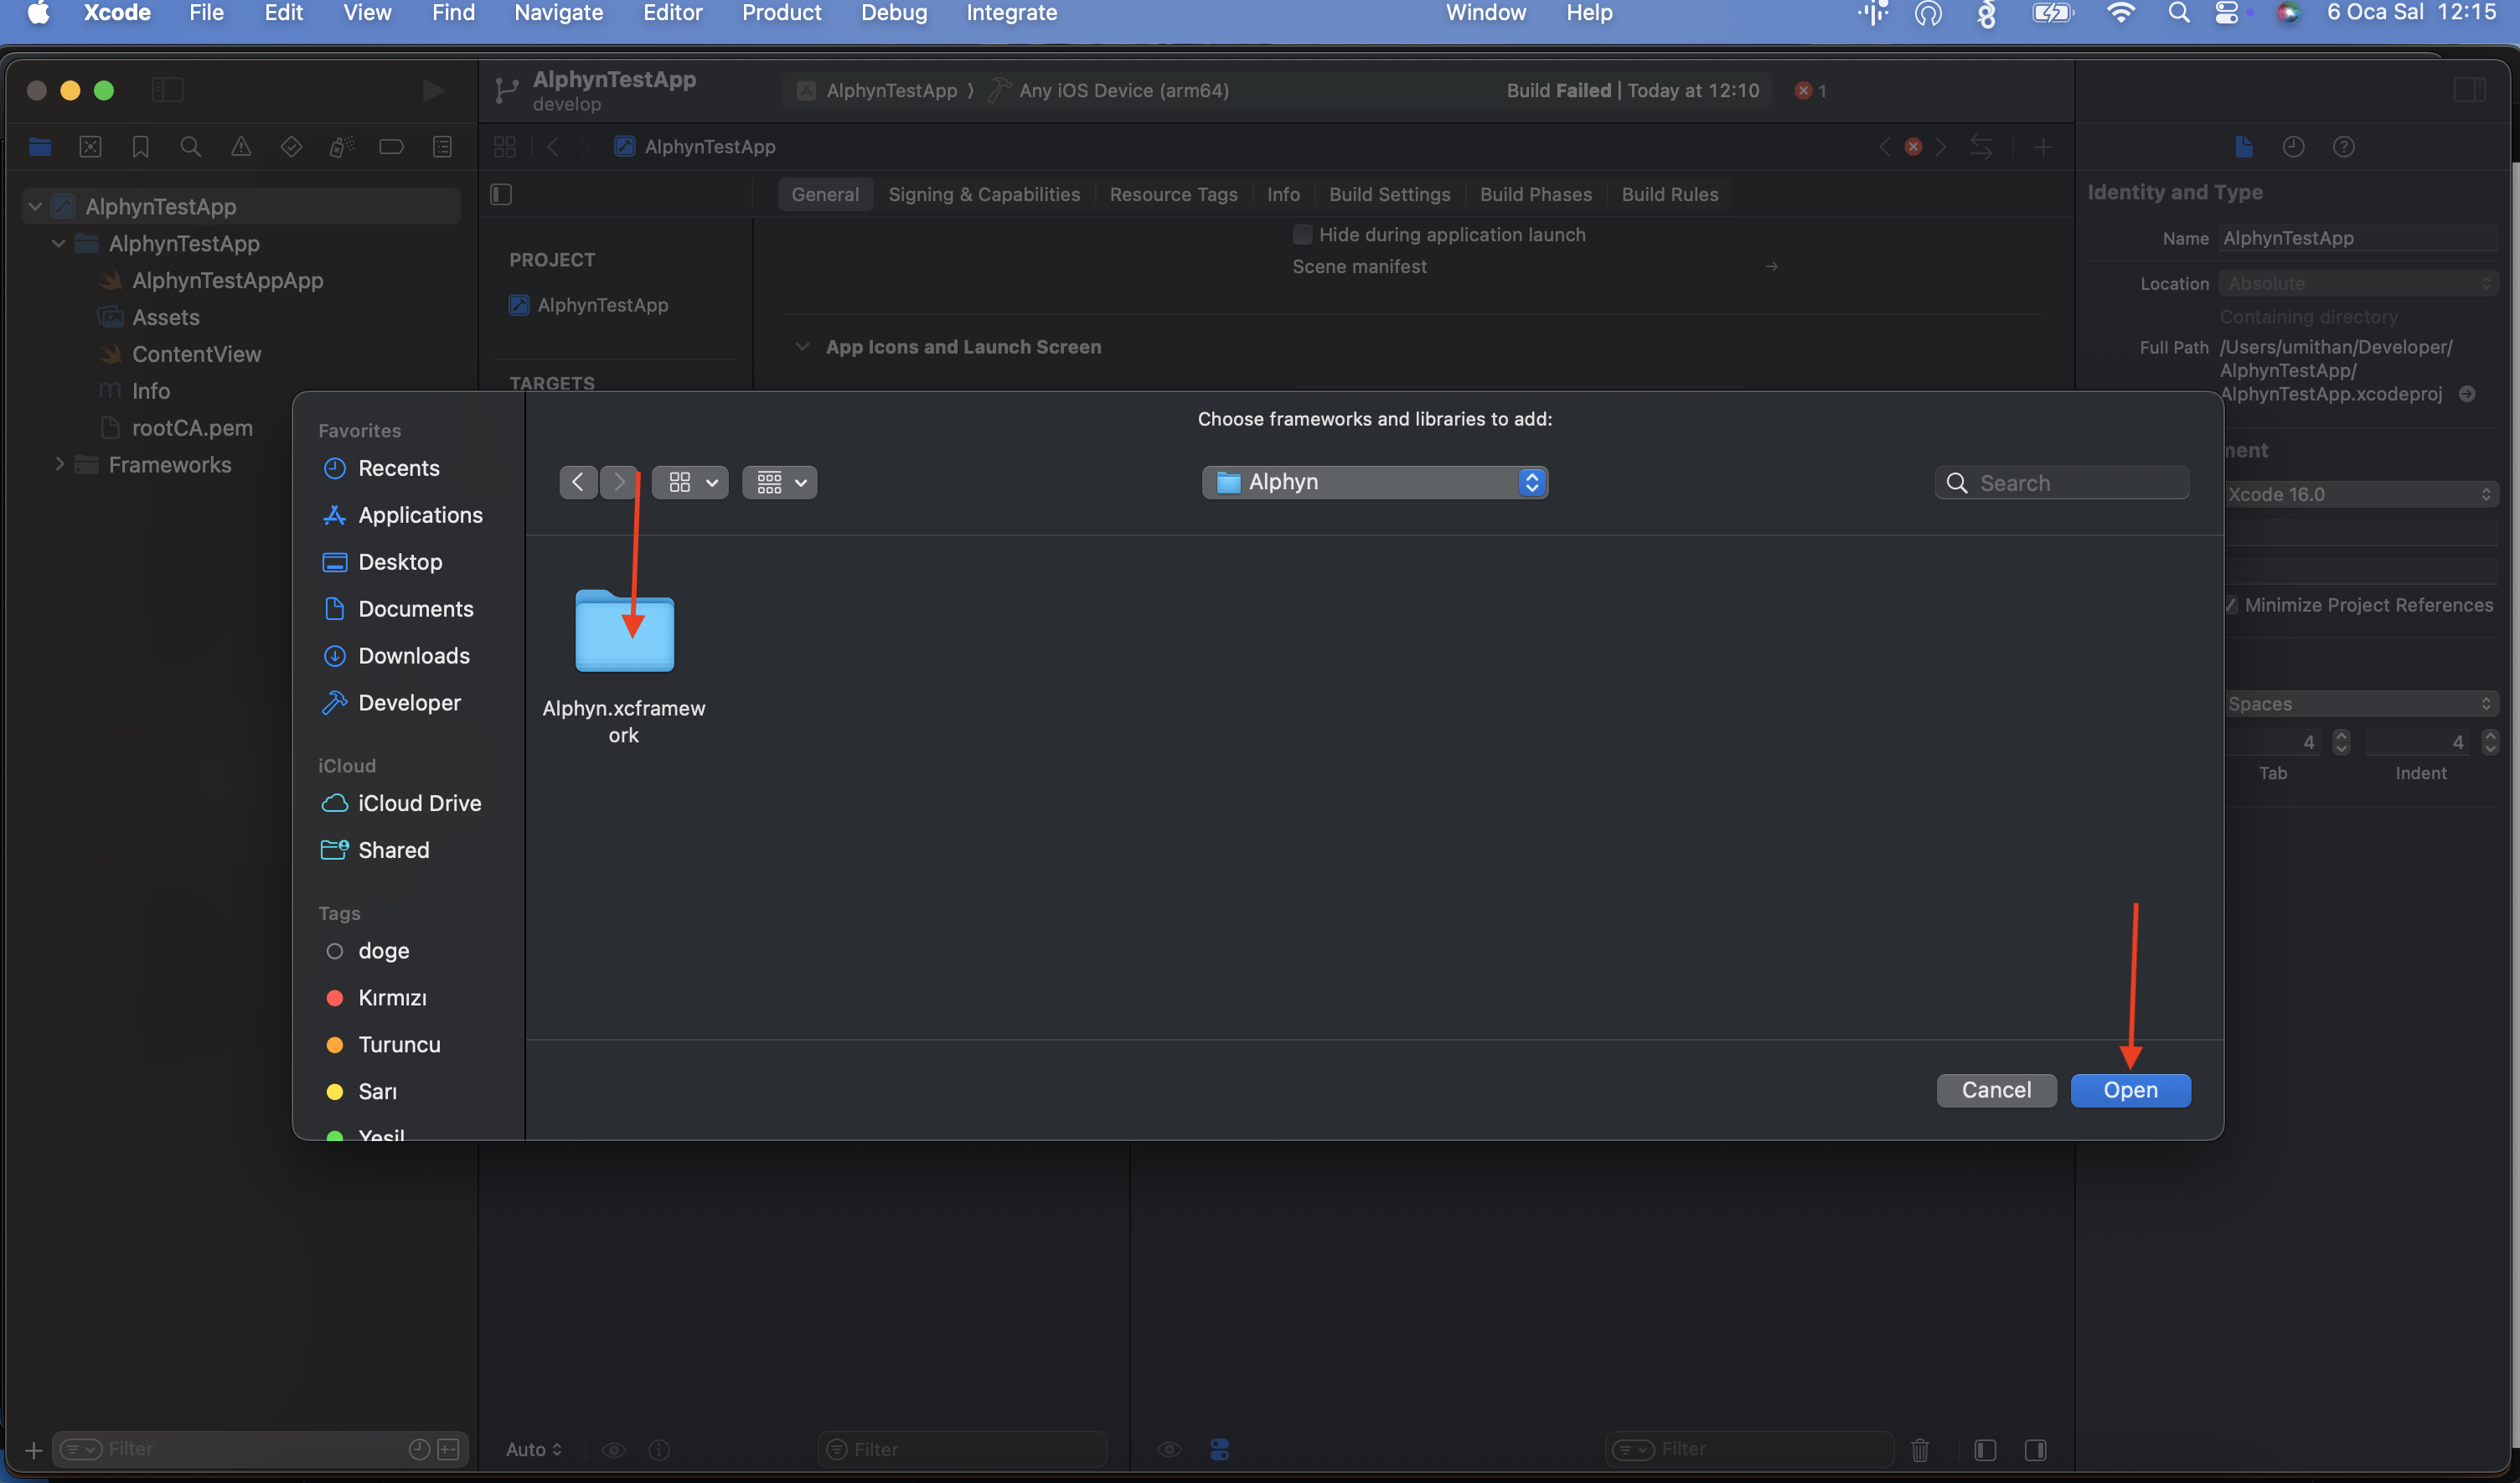
Expected result: Alphyn.xcframework is added to your target.
Tip If Xcode asks about embedding:
- Prefer Embed & Sign for app targets.
Step 9: Archive Your App
Section titled “Step 9: Archive Your App”- From the top menu, select: Product > Archive
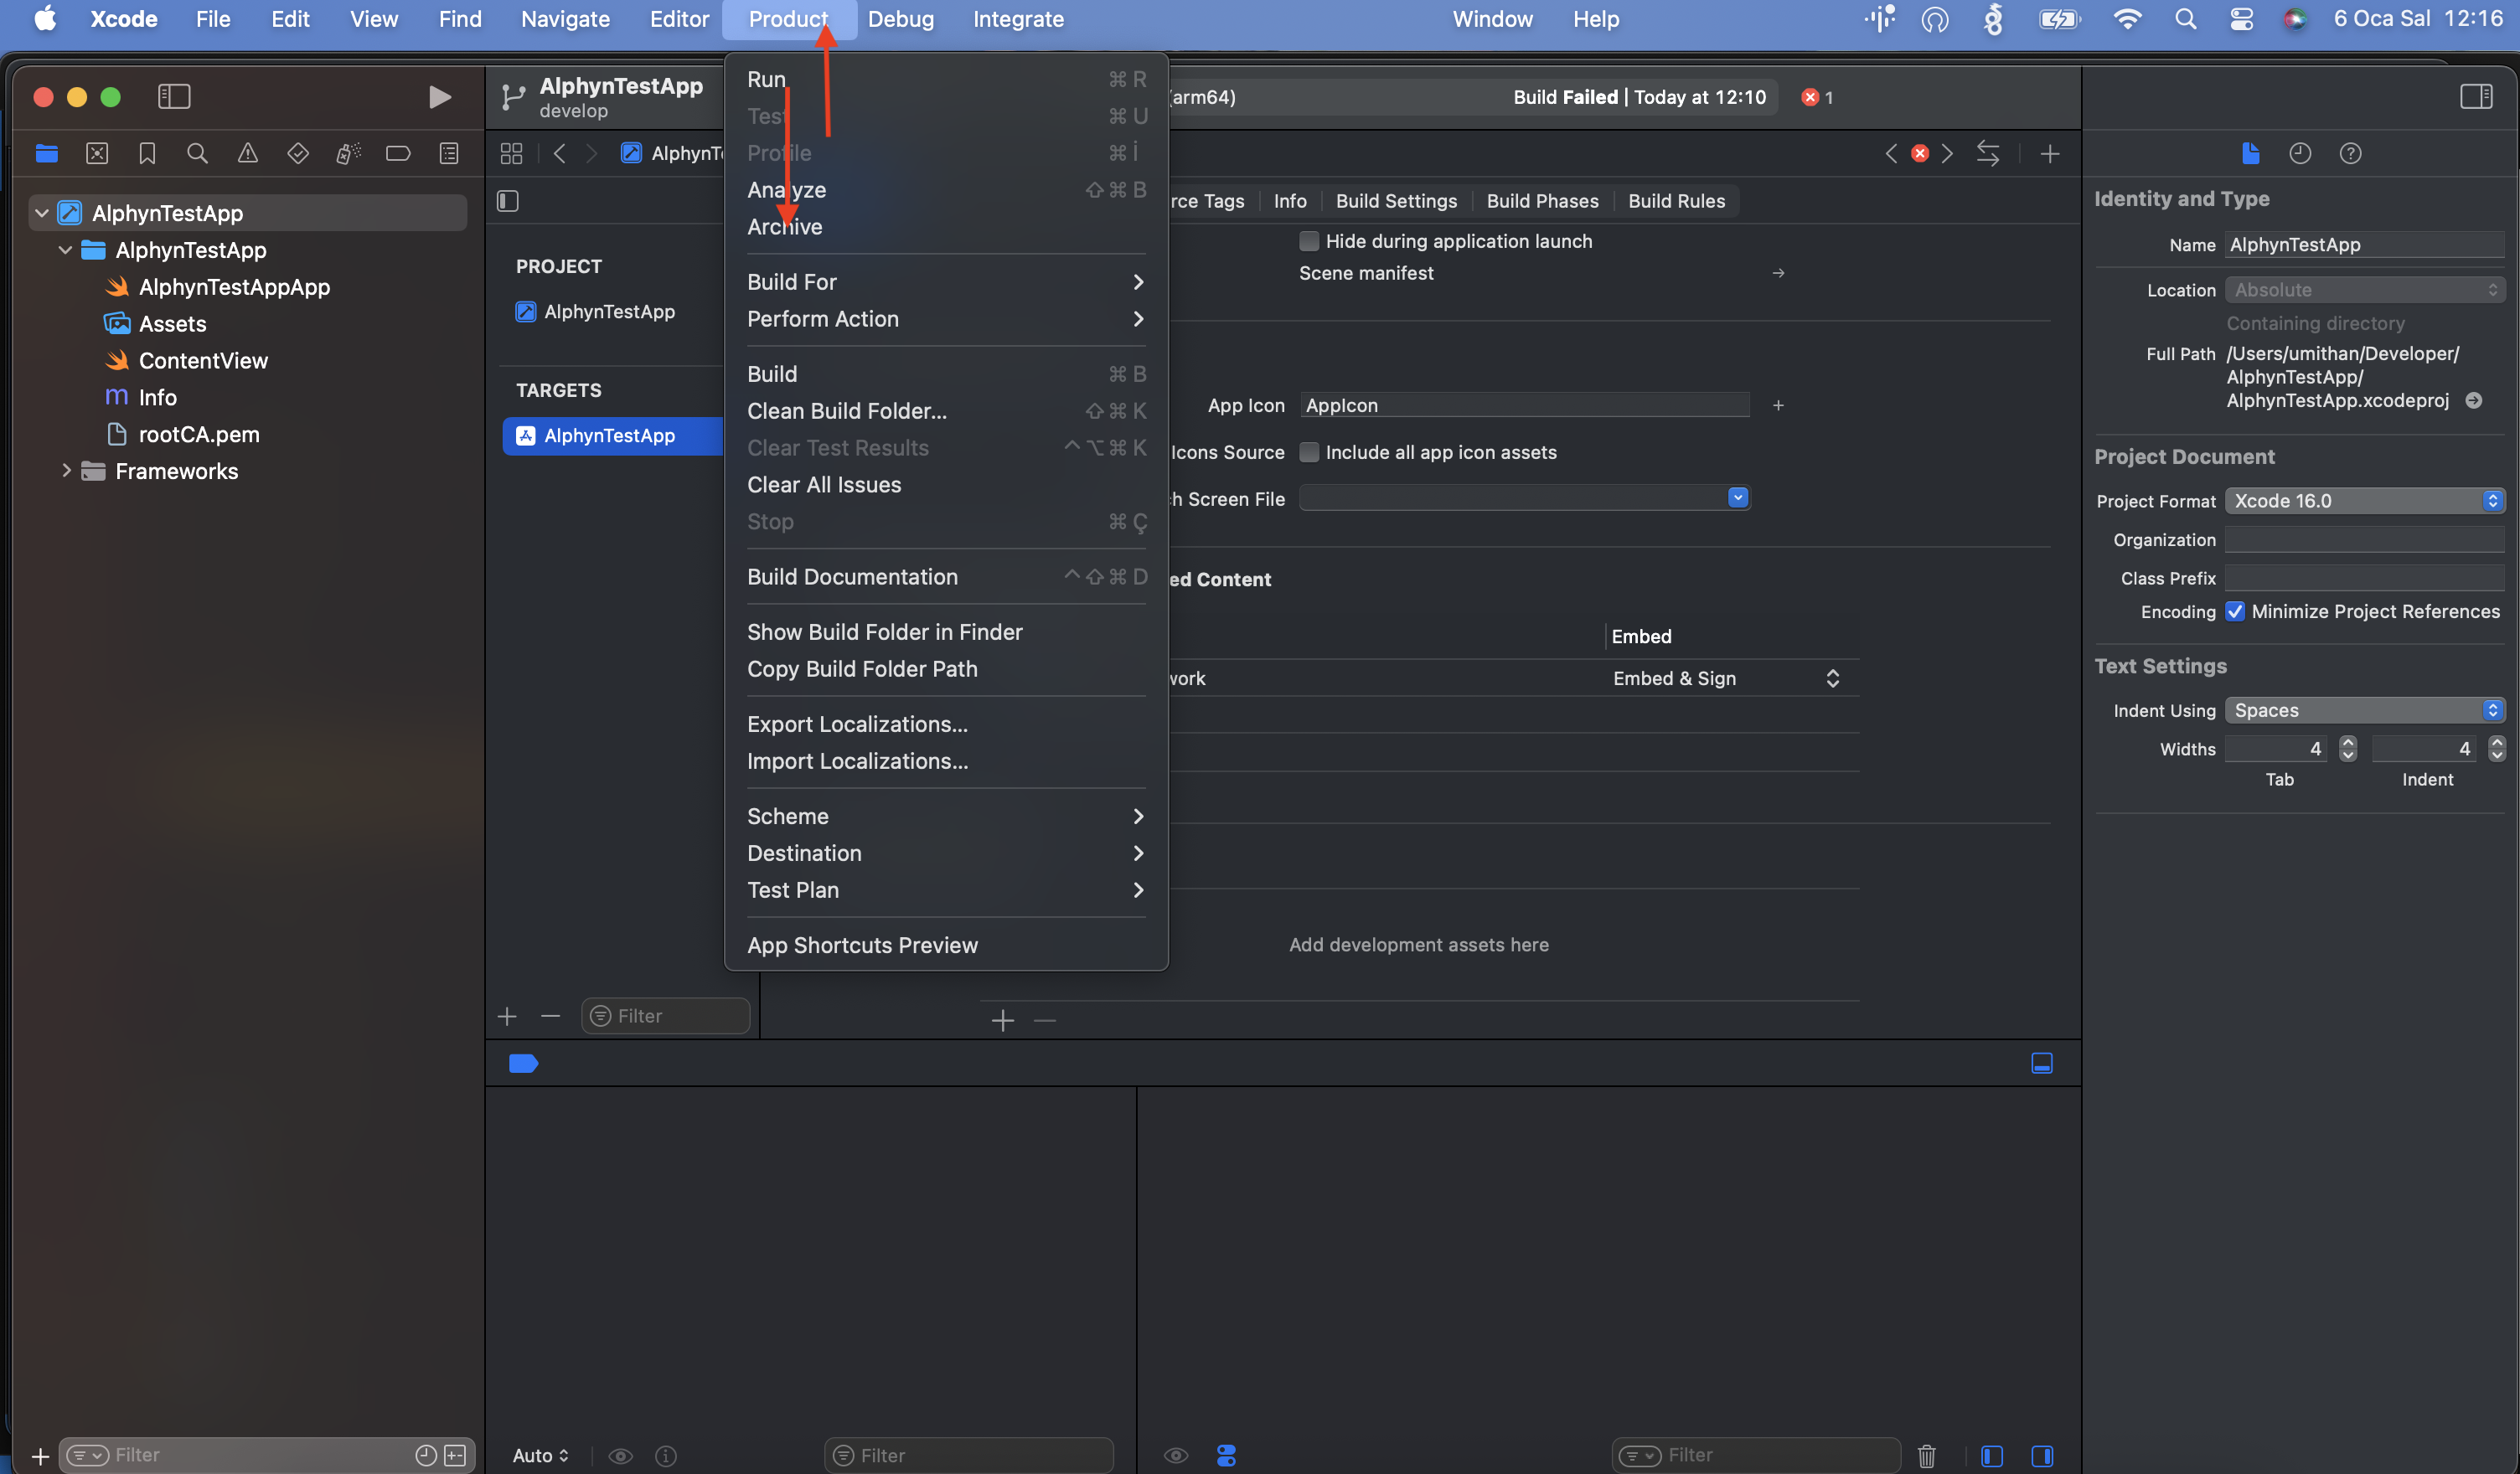
Expected result: Xcode starts archiving your app (you’ll see build progress).
Step 10: Verify Registration in Organizer
Section titled “Step 10: Verify Registration in Organizer”- After archive finishes, Xcode Organizer opens automatically.
- You should see your archived build listed, indicating the integration and post-action executed.
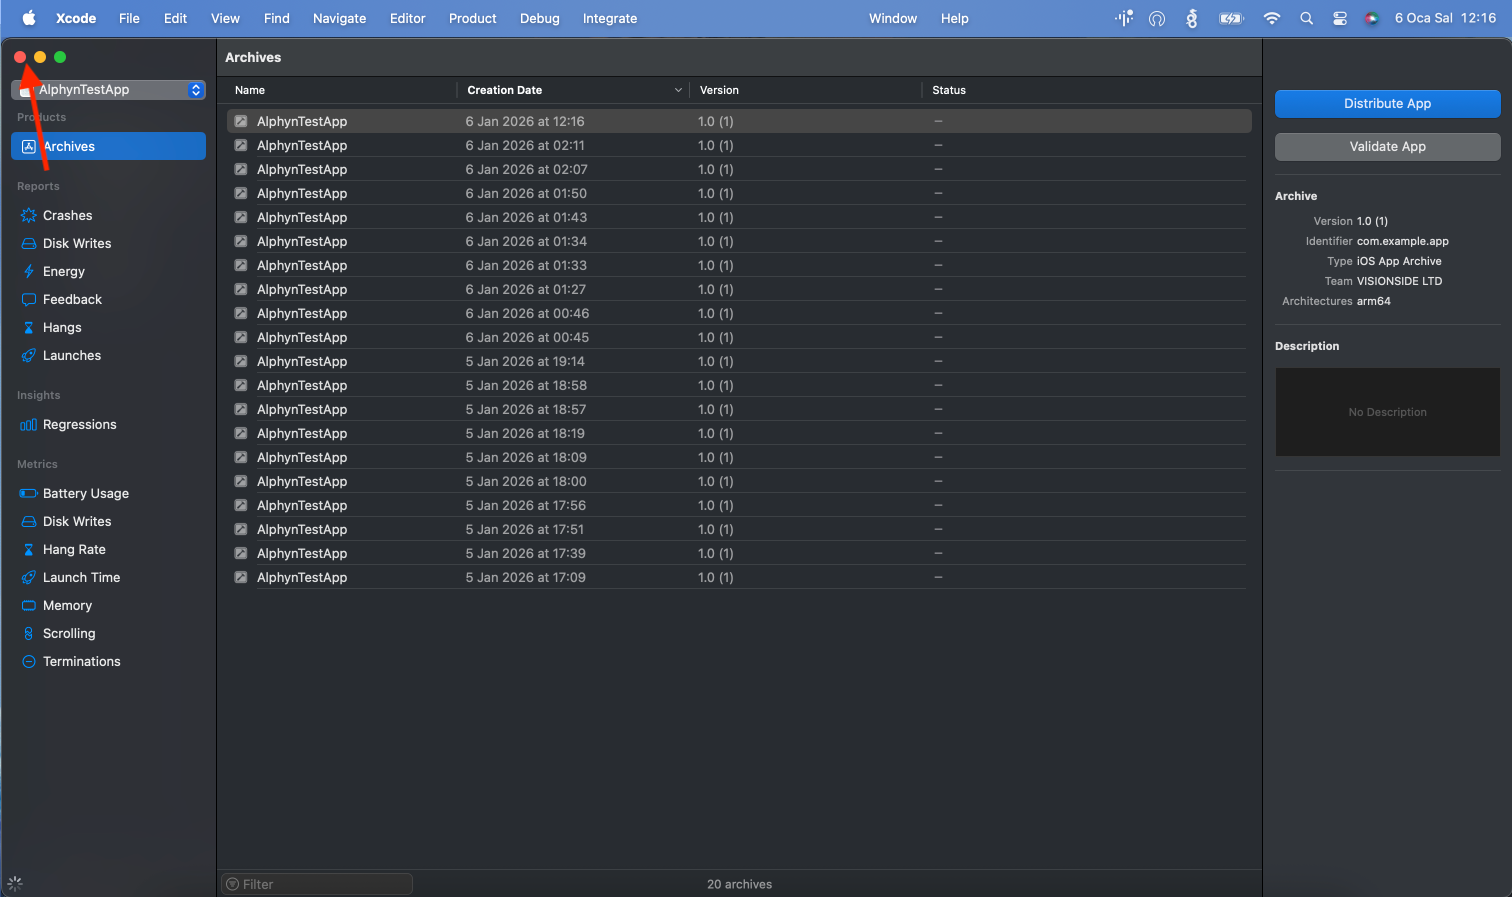
Expected result: Organizer shows your app archive and the app is considered registered/ready. Now you can safely close organizer.